Digia Clevertap Integration
The Digia CleverTap plugin intercepts CleverTap In-App and CleverTap Native Display campaign payloads and pipes them directly into Digia's rendering engine. When a campaign triggers, the plugin maps the incoming payload to your custom UI designs built in the Digia Engage Dashboard, instantly rendering a 100% native experience on the device—no WebViews required. Supported experience types include bottom sheets, dialogs, inline banners, tooltips, and spotlights.
Prefer a quick visual walkthrough first? Watch How to Integrate Digia Engage and CleverTap for Campaigns.
This guide walks you through the end-to-end integration process—covering SDK installation, plugin initialization, and how to map your dashboard campaigns to Digia's native components.
Prerequisites
Before integrating, ensure you have:
- Digia Access Key: Log in to the Digia Engage Dashboard, open your project, and copy your key from Settings → App Settings.
- Active Dashboard Account: Ensure you have an active CleverTap workspace with access to your App/Account IDs.
- CleverTap SDK: Installed and initialized (see Flutter, Android, iOS, or React Native Quick Start).
Minimum Supported Versions
- React Native
- Android
- iOS (Swift)
- Flutter
- Environment: React Native
0.83+, React19.2+ - Digia packages:
@digia-engage/core,@digia-engage/clevertap - CleverTap SDK:
clevertap-react-native
- Environment:
minSdk 25 - Digia packages:
tech.digia:engage,tech.digia:engage-clevertap - CleverTap SDK:
com.clevertap.android:clevertap-android-sdk
- Environment: iOS
16+ - Digia packages:
DigiaEngage,DigiaEngageCleverTap - CleverTap SDK:
CleverTapSDK
- Environment: Dart
3.3+, Flutter3.29+ - Digia packages:
digia_engage,digia_engage_clevertap - CleverTap SDK:
clevertap_plugin
Install
Note: We assume the core CleverTap SDK is already installed and initialized as part of your standard app setup (see Prerequisites). The snippets below only cover adding the Digia plugin packages.
- React Native
- Android
- iOS (Swift)
- Flutter
Install the Digia packages:
npm install @digia-engage/core@2.22.0 @digia-engage/clevertap@2.5.0
Add dependencies in app build.gradle.kts (use the latest versions from Maven Central):
dependencies {
    implementation("tech.digia:engage:2.17.0")
    implementation("tech.digia:engage-clevertap:2.0.0")
}
Sync the project (Gradle sync).
Add packages using Xcode → File → Add Package Dependencies and choose Up to Next Major Version — or in Package.swift, use the latest versions from Swift Package Index:
dependencies: [
    .package(url: "https://github.com/Digia-Technology-Private-Limited/digia_engage_iOS.git", from: "3.14.0"),
    .package(url: "https://github.com/Digia-Technology-Private-Limited/digia_engage_clevertap_iOS.git", from: "1.0.0-beta.1"),
],
Then add these products to your app target dependencies:
DigiaEngageDigiaEngageCleverTap
Add the Digia packages using the flutter pub add command:
flutter pub add digia_engage:1.19.0 digia_engage_clevertap:1.3.0
Initialize Digia with CleverTap
Set up Digia and register the CleverTap plugin during app startup.
- React Native
- Android
- iOS (Swift)
- Flutter
JS setup
import { useEffect } from 'react';
import CleverTap from 'clevertap-react-native';
import { Digia } from '@digia-engage/core';
import { DigiaCleverTapPlugin, createCleverTapClient } from '@digia-engage/clevertap';

export function RootApp() {
  useEffect(() => {
    (async () => {
      // 1. CleverTap SDK — must be initialized as a prerequisite.

      // 2. Initialize Digia once at startup.
      await Digia.initialize({
        apiKey: 'YOUR_ACCESS_KEY',
      });

      // 3. Register the Digia CleverTap plugin.
      Digia.register(
        new DigiaCleverTapPlugin({
          cleverTap: createCleverTapClient(CleverTap),
        })
      );

      // 4. Wire screen tracking to your navigation library.
      // Call Digia.setCurrentScreen(routeName) on every navigation change so
      // screen-triggered campaigns fire on the correct screen.
    })().catch(console.error);
  }, []);

  return <AppNavigator />;
}
Android native setup
Important: Even in a React Native app, the CleverTap SDK requires Activity lifecycle registration on the Android side. Without it, all In-App campaigns (including App Launch triggers), push notification click callbacks from the killed state, and session tracking will not work. See the CleverTap React Native Android integration guide.
- Extending
CleverTapApplication— registration is handled automatically. No extra call needed.- Not extending
CleverTapApplication— callActivityLifecycleCallback.register(this)manually inMainApplication.onCreate(), beforesuper.onCreate():
- Kotlin
- Java
import com.clevertap.android.sdk.ActivityLifecycleCallback
import com.clevertap.react.CleverTapRnAPI

class MainApplication : ReactApplication {
    override fun onCreate() {
        ActivityLifecycleCallback.register(this) // must be before super.onCreate()
        super.onCreate()
        CleverTapRnAPI.initReactNativeIntegration(this) // must be after super.onCreate()
        // ...
    }
}
import com.clevertap.android.sdk.ActivityLifecycleCallback;
import com.clevertap.react.CleverTapRnAPI;

public class MainApplication implements ReactApplication {
    @Override
    public void onCreate() {
        ActivityLifecycleCallback.register(this); // must be before super.onCreate()
        super.onCreate();
        CleverTapRnAPI.initReactNativeIntegration(this); // must be after super.onCreate()
        // ...
    }
}
Also required:
CleverTapRnAPI.initReactNativeIntegration(this)must be called aftersuper.onCreate(). Without it, push notification click callbacks will not fire when the app is in the killed state (ClevertapPushNotificationClickedevent will be lost).
iOS native setup
Important: Even in a React Native app,
CleverTap.autoIntegrate()must be called in your nativeAppDelegatebefore the React bridge initializes. Without it, CleverTap cannot intercept push notifications, deep links, or app launch events on iOS — meaning App Launch triggered campaigns, push notification handling, and In-App display will not work. See the CleverTap React Native iOS integration guide.
- Swift
- Objective-C
// AppDelegate.swift
import CleverTapSDK
import CleverTapReact

@UIApplicationMain
class AppDelegate: UIResponder, UIApplicationDelegate {
    func application(_ application: UIApplication, didFinishLaunchingWithOptions launchOptions: [UIApplication.LaunchOptionsKey: Any]?) -> Bool {
        CleverTap.autoIntegrate()
        CleverTapReactManager.sharedInstance()?.applicationDidLaunch(options: launchOptions)
        // ...
        return true
    }
}
// AppDelegate.mm
#import <CleverTap-iOS-SDK/CleverTap.h>
#import <clevertap-react-native/CleverTapReactManager.h>

- (BOOL)application:(UIApplication *)application didFinishLaunchingWithOptions:(NSDictionary *)launchOptions {
    [CleverTap autoIntegrate];
    [[CleverTapReactManager sharedInstance] applicationDidLaunchWithOptions:launchOptions];
    // ...
    return YES;
}
Important (Android — Activity Lifecycle Registration): The CleverTap SDK needs to observe Activity lifecycle events to correctly handle In-App campaigns (including App Launch triggers), push notification click callbacks from the killed state, and session tracking. How you register depends on your
Applicationclass setup:
- Extending
CleverTapApplication— registration is handled automatically by the superclass. No extra call needed.- Not extending
CleverTapApplication— you must callActivityLifecycleCallback.register(this)manually, beforesuper.onCreate(), as shown below.See CleverTap Android integration guide for full details.
import android.app.Application
import com.clevertap.android.sdk.ActivityLifecycleCallback
import com.digia.engage.Digia
import com.digia.engage.DigiaConfig
import com.digia.engage.clevertap.DigiaCleverTapPlugin

class MyApplication : Application() {
    override fun onCreate() {
        // Must be called before super.onCreate() — see note above.
        ActivityLifecycleCallback.register(this)
        super.onCreate()

        // 2. Initialize Digia before registering any CEP plugin.
        Digia.initialize(
            context = applicationContext,
            config = DigiaConfig(apiKey = "YOUR_ACCESS_KEY"),
        )

        // 3. Register the Digia CleverTap plugin. Context is required to resolve the CleverTap default instance.
        Digia.register(DigiaCleverTapPlugin(applicationContext))
    }
}
import SwiftUI
import DigiaEngage
import DigiaEngageCleverTap

@main
struct MyApp: App {
    init() {
        // 1. CleverTap SDK — initialized as a prerequisite.
        CleverTap.autoIntegrate()

        // 2. Initialize Digia before registering any CEP plugin.
        Task {
            do {
                try await Digia.initialize(DigiaConfig(apiKey: "YOUR_ACCESS_KEY"))

                // 3. Register the Digia CleverTap plugin.
                Digia.register(DigiaCleverTapPlugin())
            } catch { }
        }
    }

    var body: some Scene {
        WindowGroup {
            RootView()
        }
    }
}
import 'package:digia_engage/digia_engage.dart';
import 'package:digia_engage_clevertap/digia_engage_clevertap.dart';
import 'package:flutter/material.dart';

Future<void> main() async {
  WidgetsFlutterBinding.ensureInitialized();

  // 1. CleverTap SDK — initialized as a prerequisite.

  // 2. Initialize Digia before registering any CEP plugin.
  await Digia.initialize(
    DigiaConfig(apiKey: 'YOUR_ACCESS_KEY'),
  );

  // 3. Register the Digia CleverTap plugin.
  Digia.register(DigiaCleverTapPlugin());
  runApp(const MyApp());
}
Android native setup
Important: Even in a Flutter app, the CleverTap SDK requires Activity lifecycle registration on the Android side. Without it, In-App campaigns (including App Launch triggers), push notification click callbacks from the killed state, and session tracking will not work. See the CleverTap Flutter Android integration guide.
Register
ActivityLifecycleCallbackin yourApplicationclass, beforesuper.onCreate():
- Kotlin
- Java
import com.clevertap.android.sdk.ActivityLifecycleCallback
import io.flutter.app.FlutterApplication

class MyApplication : FlutterApplication() {
    override fun onCreate() {
        ActivityLifecycleCallback.register(this) // must be before super.onCreate()
        super.onCreate()
    }
}
import com.clevertap.android.sdk.ActivityLifecycleCallback;
import io.flutter.app.FlutterApplication;

public class MyApplication extends FlutterApplication {
    @Override
    public void onCreate() {
        ActivityLifecycleCallback.register(this); // must be before super.onCreate()
        super.onCreate();
    }
}
iOS native setup
Important: Even in a Flutter app,
CleverTap.autoIntegrate()must be called in your nativeAppDelegatebefore the Flutter engine initializes. Without it, CleverTap cannot intercept push notifications, deep links, or App Launch events on iOS — meaning App Launch triggered campaigns and In-App display will not work. See the CleverTap Flutter iOS integration guide.
- Swift
- Objective-C
// AppDelegate.swift
import CleverTapSDK
import clevertap_plugin

@UIApplicationMain
class AppDelegate: FlutterAppDelegate {
    override func application(_ application: UIApplication, didFinishLaunchingWithOptions launchOptions: [UIApplication.LaunchOptionsKey: Any]?) -> Bool {
        CleverTap.autoIntegrate()
        CleverTapPlugin.sharedInstance()?.applicationDidLaunch(options: launchOptions)
        // ...
        return super.application(application, didFinishLaunchingWithOptions: launchOptions)
    }
}
// AppDelegate.m
#import <CleverTap-iOS-SDK/CleverTap.h>
#import <clevertap_plugin/CleverTapPlugin.h>

- (BOOL)application:(UIApplication *)application didFinishLaunchingWithOptions:(NSDictionary *)launchOptions {
    [CleverTap autoIntegrate];
    [[CleverTapPlugin sharedInstance] applicationDidLaunchWithOptions:launchOptions];
    // ...
    return [super application:application didFinishLaunchingWithOptions:launchOptions];
}
Advanced Config Options (React Native)
Digia.initialize() accepts additional fields that control SDK behaviour:
await Digia.initialize({
  apiKey: 'YOUR_ACCESS_KEY',
  environment: 'production',   // 'production' | 'sandbox' — defaults to 'production'
  logLevel: 'error',           // 'none' | 'error' | 'verbose' — defaults to 'error'
  actionHandlers: {
    // Own how specific campaign actions are handled. A registered handler
    // fully replaces the SDK's default behavior for that action.
    customKV: (payload) => {/* run an app-owned key-value command */},
    deepLink: (url) => {/* navigate in-app */},
    openURL: (url) => {/* present a web URL */},
  },
  linking: {
    inAppBrowser: defaultInAppBrowser, // Required for open_url with presentation: 'in_app'
  },
});
For full details on action types, deep link URL format, action handlers, and the in-app browser adapter — see Campaign Actions. These apply to all CEP integrations, not just CleverTap.
How Digia Maps to CleverTap Campaigns
If you haven't read How It Works in the overview, start there. The section below covers only what is CleverTap-specific.
In short: CleverTap decides who sees a campaign and when. Digia decides what is rendered. The two are linked by a digia_campaign_key you set in the CleverTap dashboard — the Digia plugin reads that key, resolves it against its local cache, and renders the right experience natively.
The table below shows how each Digia experience type maps to a CleverTap campaign type and which SDK component handles it on the app side:
| Experience Type | Digia Component | CleverTap Campaign Type | Description |
|---|---|---|---|
| Nudge | DigiaHost | In-App (Custom Code Template) | Receives the DigiaTemplate payload and renders overlay experiences (bottom sheets, dialogs) above app content. |
| Guide | DigiaAnchor + DigiaHost | In-App (Custom Code Template) | Step-by-step tooltip/spotlight flows anchored to specific UI elements. Each step targets a registered anchorKey. |
| Survey | DigiaHost | In-App (Custom Code Template) | Multi-step survey flows rendered as overlays. |
| Inline | DigiaSlot | Native Display | Receives placement key/value pairs and renders inline content (banners, cards) within the app layout. |
Here is the end-to-end flow for an In-App campaign (Nudge, Guide, or Survey):
The Campaign Contract
Whatever the experience type, a Digia-powered CleverTap campaign always carries the same two things:
digia_campaign_key(required) — the key of the Digia campaign to render. This alone determines the experience type (nudge, guide, survey, or inline) and its design; nothing about the UI lives in the CleverTap payload.variables(optional) — a JSON object of runtime values interpolated into the campaign at render time (for example a coupon code or the user's name).
CleverTap is the one CEP that delivers this contract through two different campaign types, depending on the experience:
| Delivery channel | Used for | Where you set the contract | Prerequisite |
|---|---|---|---|
| In-App (Custom Code Template) | Nudge, Guide, Survey | As fields on the DigiaTemplate template | DigiaTemplate must be synced once — see Sync DigiaTemplate to Dashboard |
| Native Display | Inline | As a custom key-value pair | None |
The per-experience sections below show exactly where to enter digia_campaign_key and variables for each case.
Sync DigiaTemplate to Dashboard
Required before creating any In-App campaign.
DigiaTemplatemust be synced to your CleverTap project before you can create Nudge or Survey campaigns. This is a one-time step per CleverTap project, performed once from a test device.
CleverTap Custom Code In-App Templates are developer-defined presentation units registered with the CleverTap SDK that replace the built-in In-App formats (banners, interstitials, etc.) with fully custom rendering logic. Instead of CleverTap rendering the UI itself, the SDK invokes your registered template handler with the campaign payload — your code decides what to render.
The Digia CleverTap plugin ships a custom code template named DigiaTemplate that acts as this handler. When CleverTap triggers an In-App campaign built on DigiaTemplate, the plugin reads the digia_campaign_key from the payload, looks up the matching Digia campaign, and delegates rendering to Digia's runtime.
Step 1 — Identify the user on the debug device
Call the CleverTap user login method in your debug build to associate the device with a known user.
- React Native
- Flutter
- Android
- iOS
import CleverTap from 'clevertap-react-native';

CleverTap.onUserLogin({
  Identity: 'user-123',
  Email: '[email protected]',
  Name: 'Jane Doe',
});
import 'package:clevertap_plugin/clevertap_plugin.dart';

CleverTapPlugin.onUserLogin({
  'Identity': 'user-123',
  'Email': '[email protected]',
  'Name': 'Jane Doe',
});
val profile = HashMap<String, Any>()
profile["Identity"] = "user-123"
profile["Email"] = "[email protected]"
profile["Name"] = "Jane Doe"

CleverTapAPI.getDefaultInstance(context)?.onUserLogin(profile)
let profile: [String: AnyObject] = [
    "Identity": "user-123" as AnyObject,
    "Email": "[email protected]" as AnyObject,
    "Name": "Jane Doe" as AnyObject,
]
CleverTap.sharedInstance()?.onUserLogin(profile)
Step 2 — Mark that user as a test profile
In the CleverTap dashboard, mark only the user from Step 1 as a test profile. See Mark a User Profile as a Test Profile in the CleverTap docs.
Step 3 — Open the app on the test device
No code changes needed. The Digia plugin registers DigiaTemplate with CleverTap automatically at startup. Simply launch the app on the device where the user from Step 1 is already identified — CleverTap will sync the template definition to your project in the background.
Step 4 — Confirm the template is synced
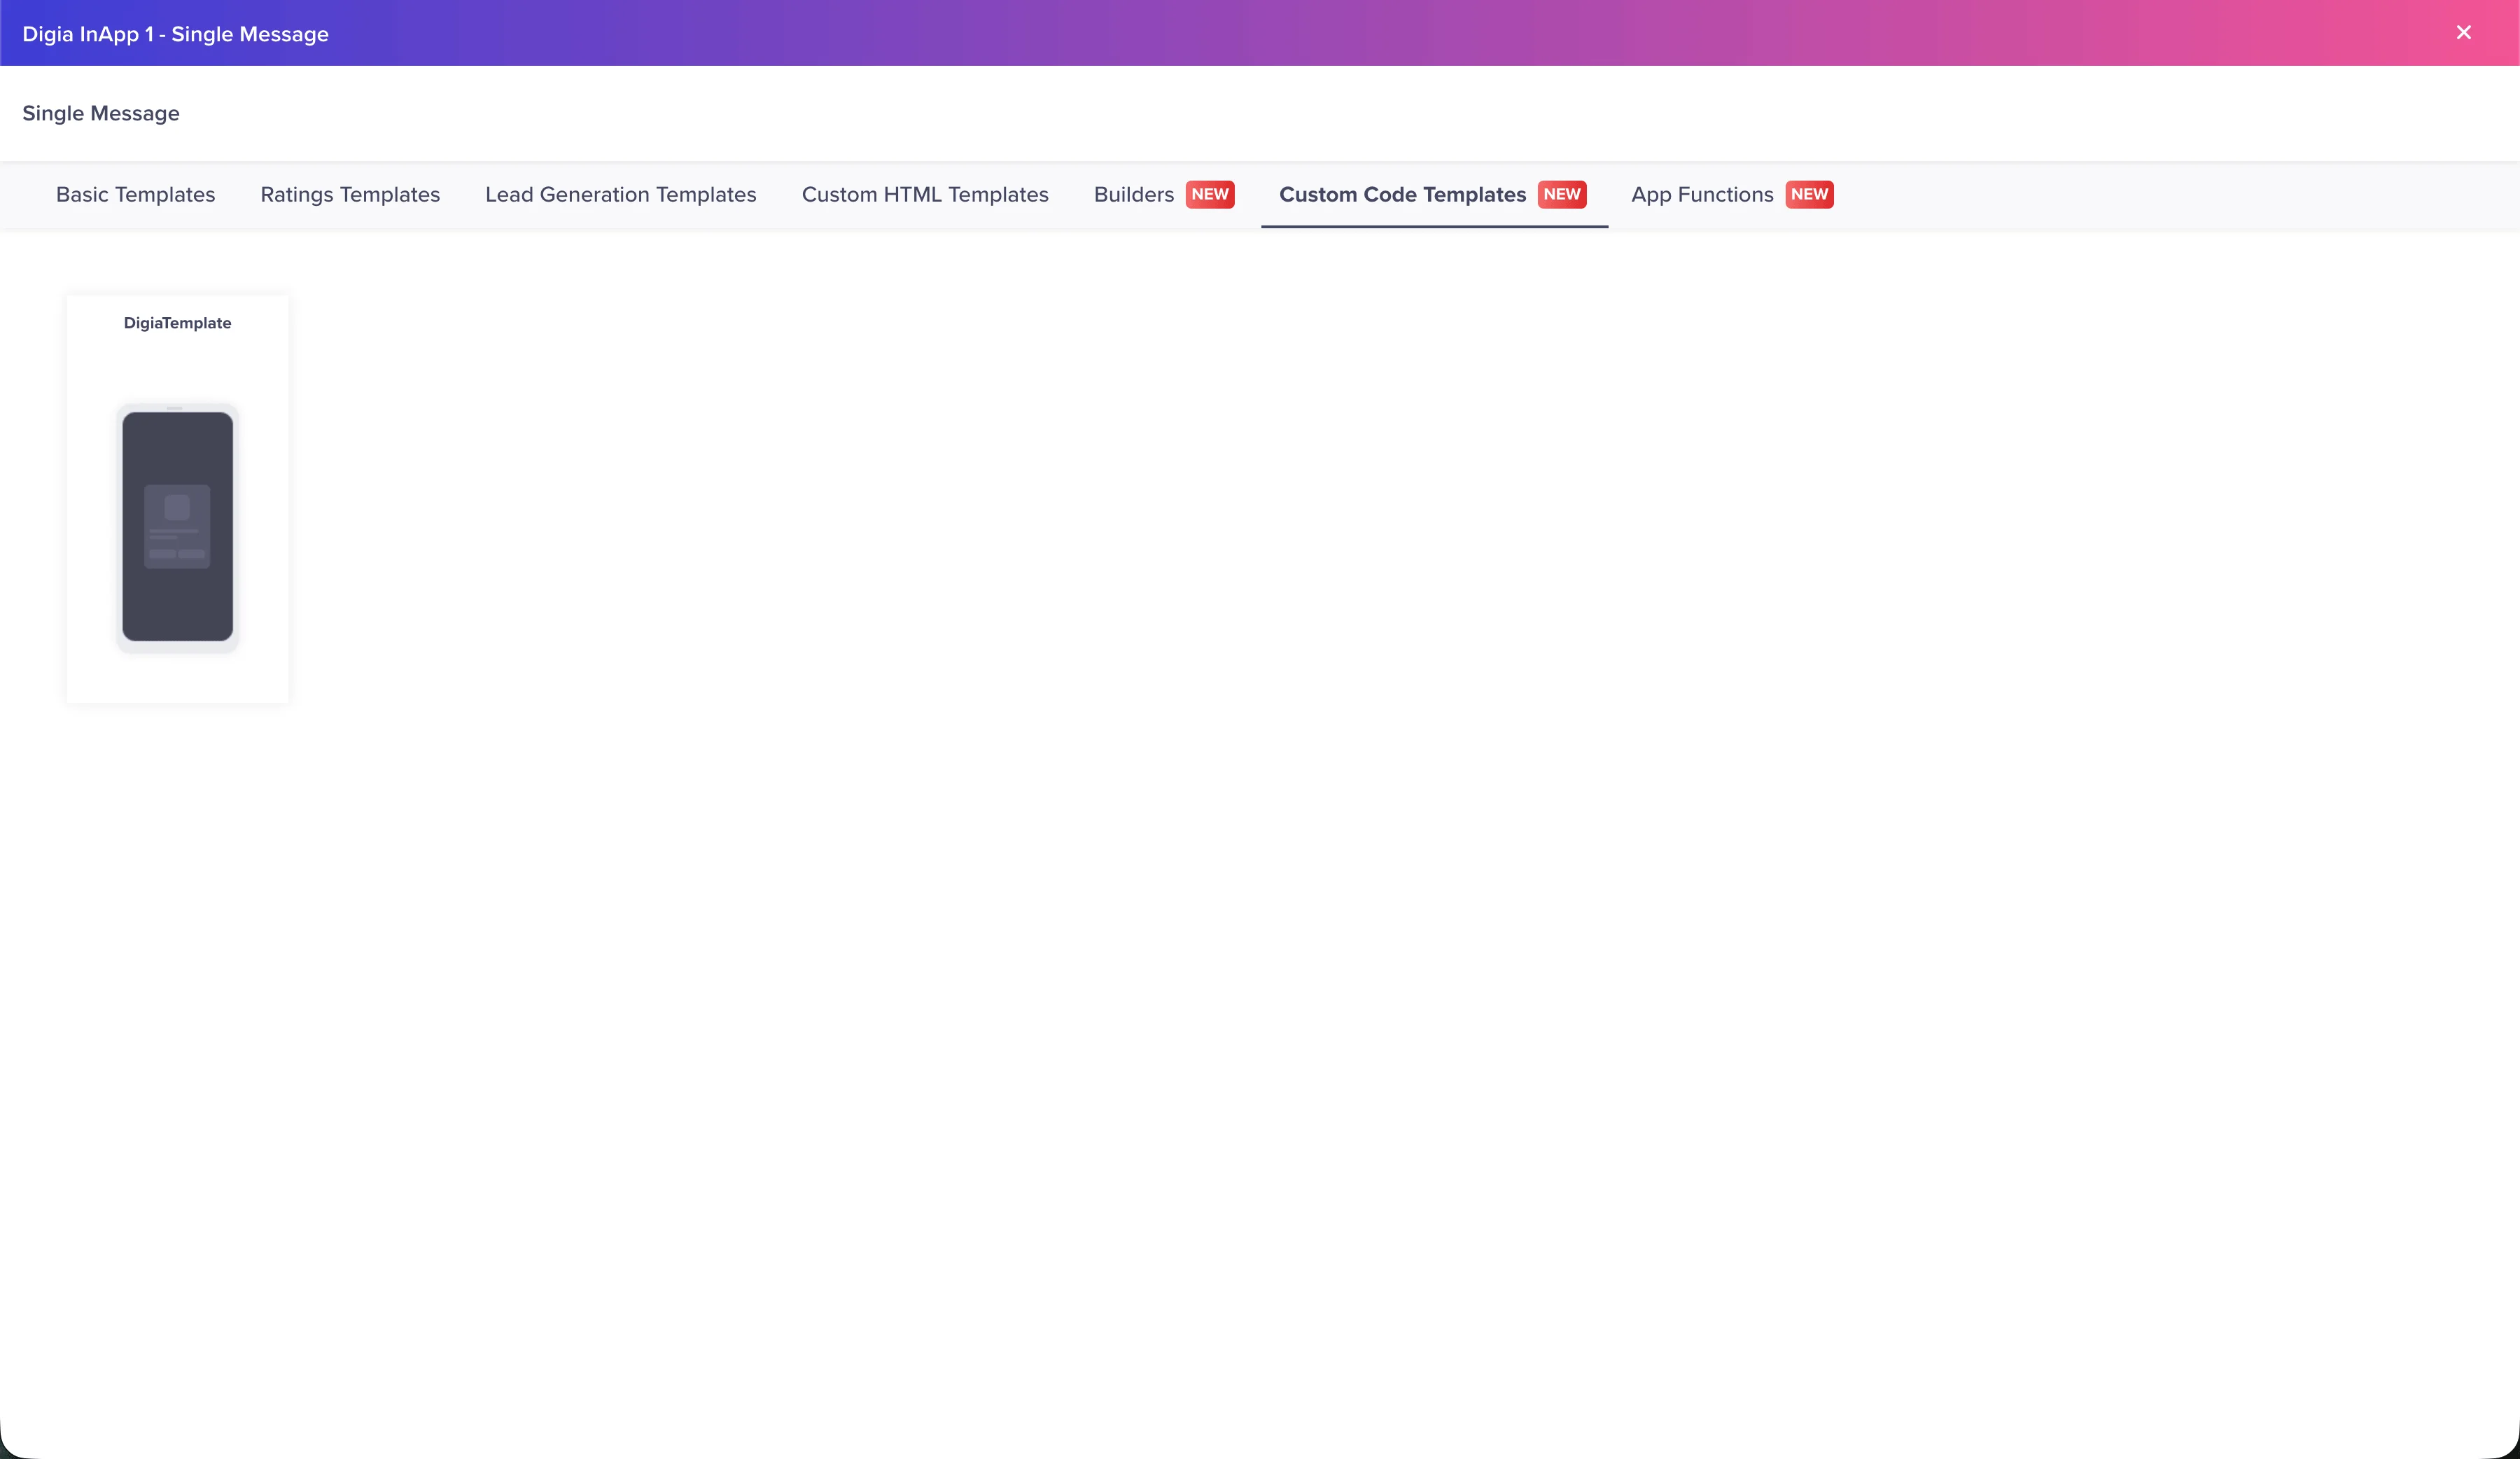
Open In-App → Templates in the CleverTap dashboard and confirm DigiaTemplate appears there before creating any In-App campaign.
Setting Up Nudges
Add the Nudge Container
Wrap your app root so overlay campaigns can render above app content.
- React Native
- Flutter
- Android
- iOS (Swift)
import React from 'react';
import { View } from 'react-native';
import { DigiaHost } from '@digia-engage/core';
import { Stack } from 'expo-router';

export default function RootLayout() {
  return (
    <View style={{ flex: 1 }}>
      {/* Mounts JS guide overlays + native nudge/survey overlay */}
      <DigiaHost />
      <Stack />
    </View>
  );
}
import 'package:digia_engage/digia_engage.dart';
import 'package:flutter/material.dart';

MaterialApp(
  navigatorObservers: [DigiaNavigatorObserver()],
  builder: (context, child) => DigiaHost(
    child: child!,
  ),
  home: const HomeScreen(),
)
Jetpack Compose
import com.digia.engage.DigiaHost

DigiaHost {
    AppNavHost()
}
For screen-triggered campaigns in View/XML flows, report the active screen from onResume():
import com.digia.engage.digiaScreen

class HomeActivity : AppCompatActivity() {
    override fun onResume() {
        super.onResume()
        digiaScreen("home")
    }
}
import SwiftUI
import DigiaEngage

struct RootContainerView: View {
    var body: some View {
        DigiaHost {
            AppRootView()
        }
    }
}
Trigger a Nudge from CleverTap
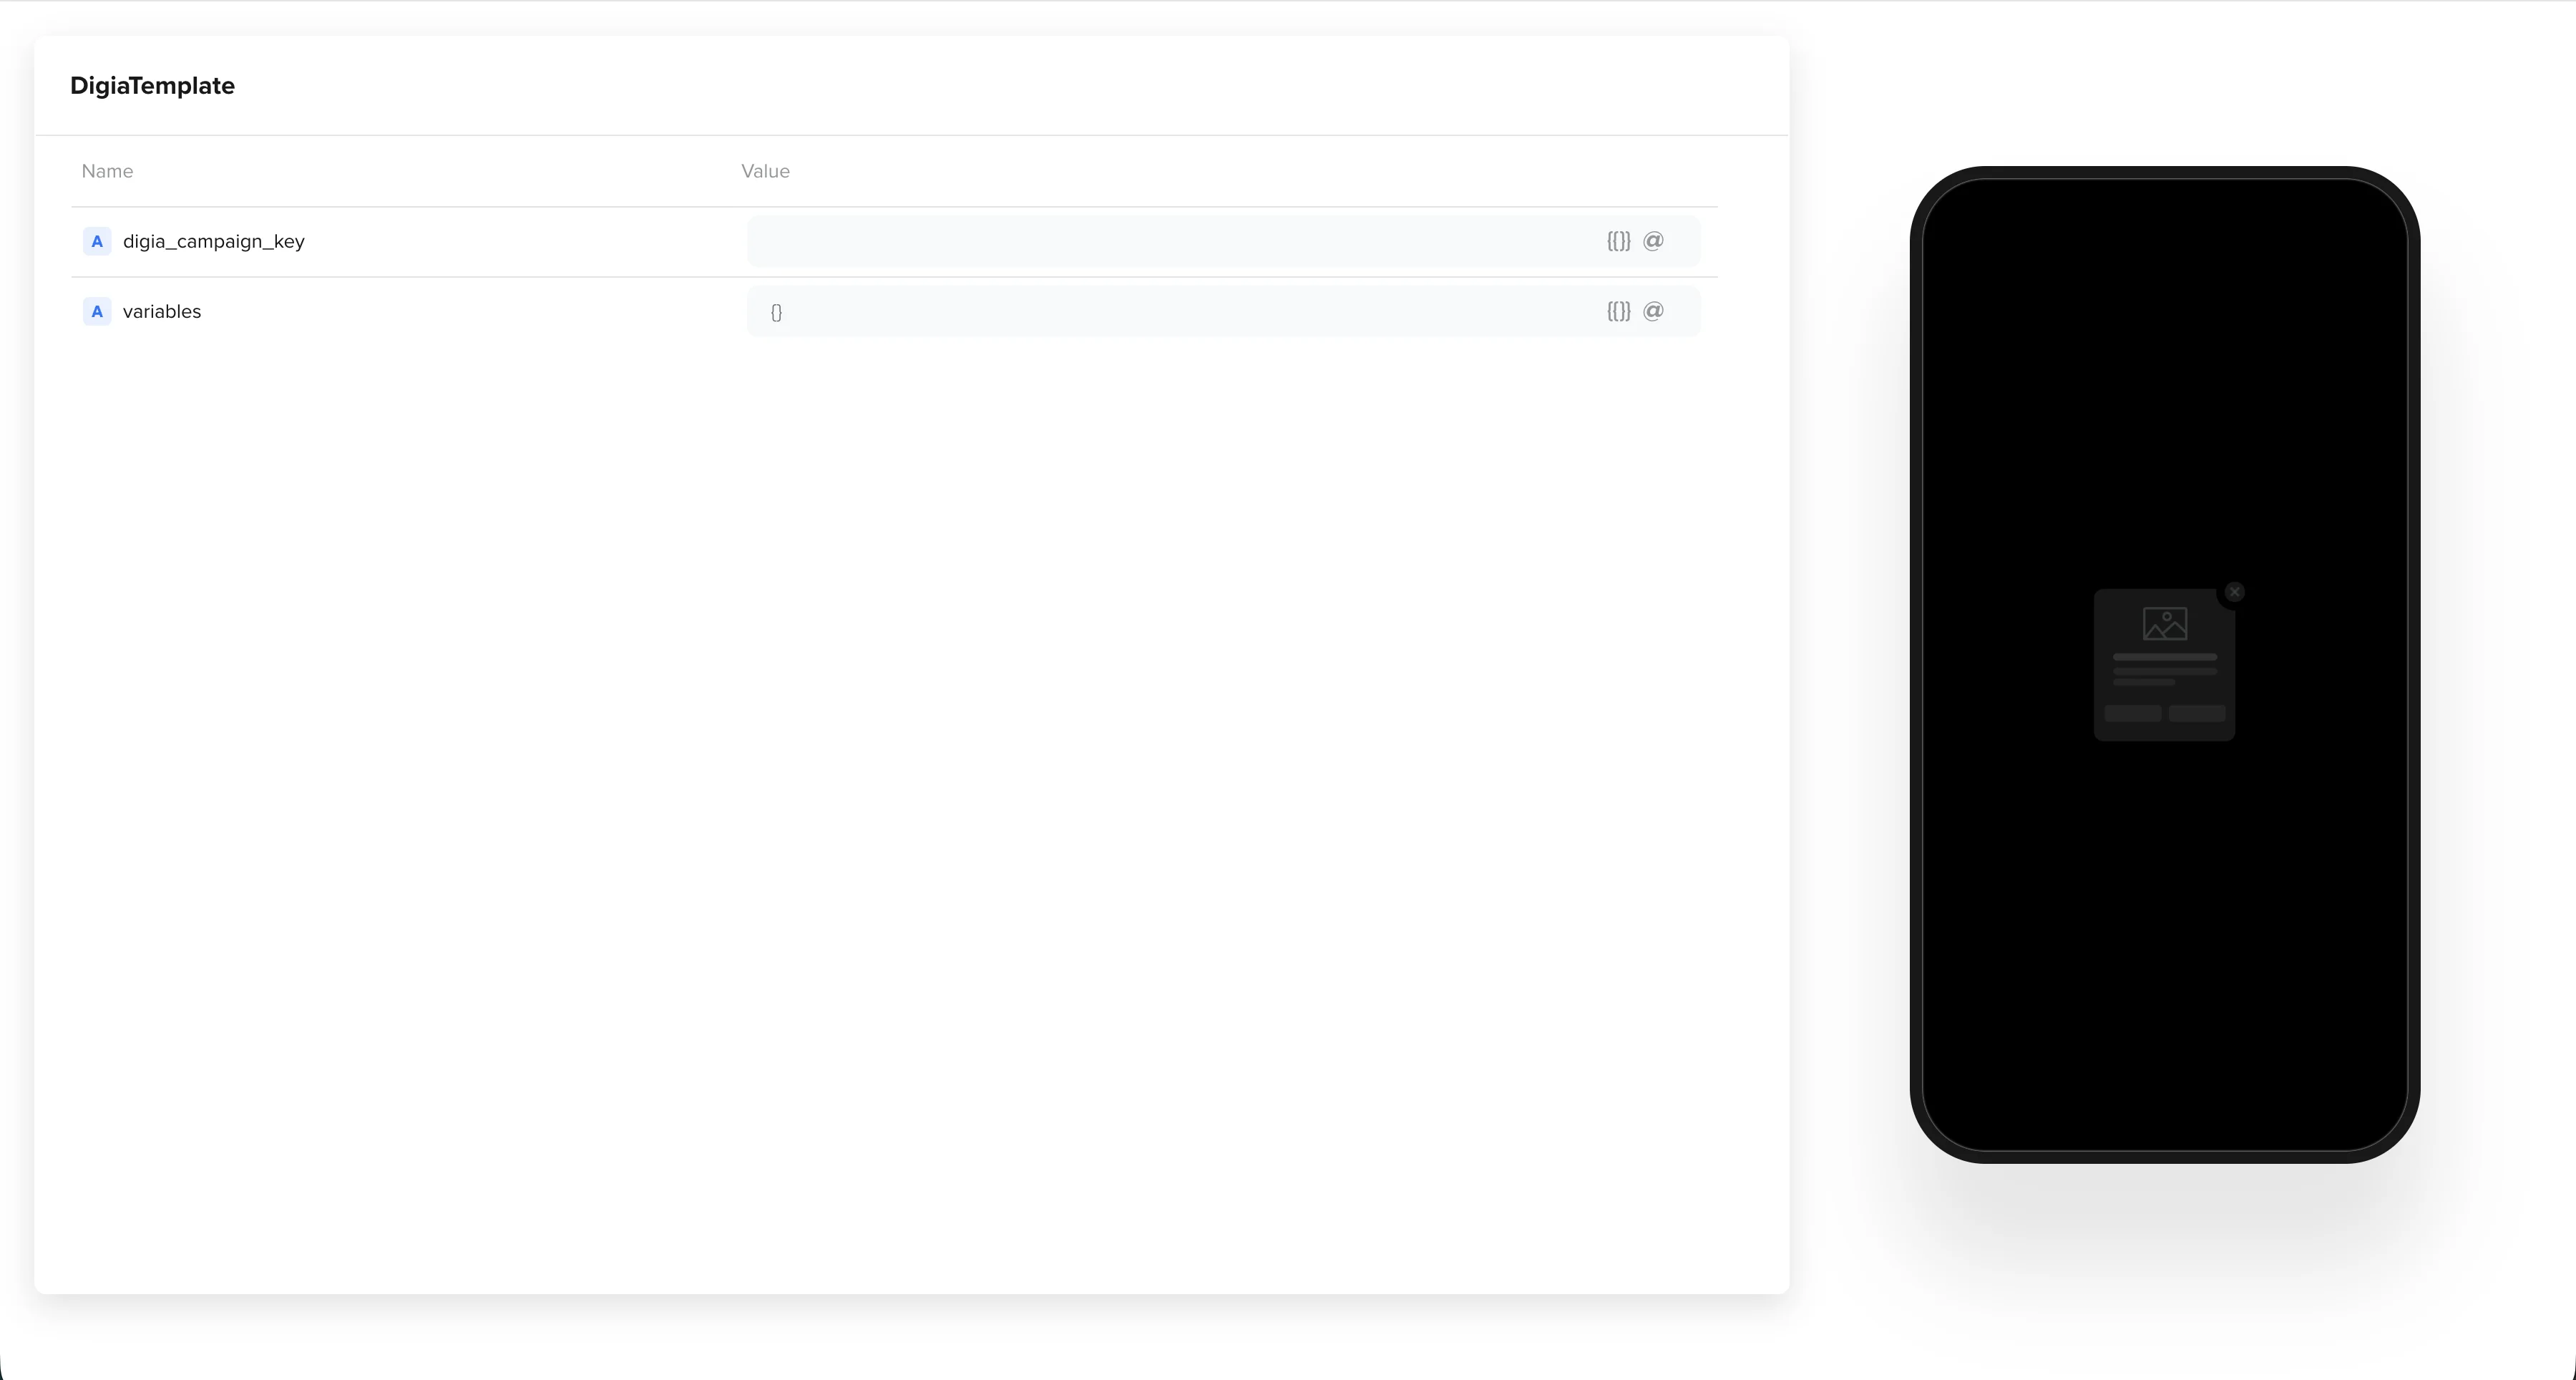
Create an In-App campaign in CleverTap using DigiaTemplate. In the campaign template, fill in the following fields:
| Field | Required | Example value | Description |
|---|---|---|---|
digia_campaign_key | Yes | promo_offer_sheet | The campaign key copied from the Digia Engage Dashboard. Must match exactly (case-sensitive). |
variables | No | {"coupon":"SAVE20"} | Runtime variables to interpolate into the campaign. Enter as a raw JSON string — see note below. |
variablesformat: Enter the value as a plain JSON string directly in the CleverTap field. Do not wrap it in outer quotes or escape the inner quotes. The plugin JSON-decodes the string automatically. An invalid JSON value is silently ignored and the campaign renders without variable substitution.
Static variables — hardcoded values set at campaign creation time:
{
  "coupon": "SAVE20",
  "offer_title": "Limited Offer"
}
CleverTap personalization variables — CleverTap resolves {{Profile.*}} placeholders at send time using the recipient's user profile, before the value reaches the Digia plugin:
{
  "user_name": "{{Profile.Name}}",
  "account_type": "{{Profile.accounttype | default:\"standard\"}}"
}
See CleverTap Personalization for the full list of supported {{Profile.*}} and {{Campaign.*}} variables.
Setting Up Inline Widgets
DigiaSlot is a composable/widget that renders Digia-powered content inline within your screen layout. Each slot is identified by a placementKey — a string that must match the slot key configured on the inline campaign in the Digia dashboard. When a Native Display campaign whose digia_campaign_key maps to an inline Digia campaign is active, the SDK resolves the campaign and renders it inside the matching slot. If no campaign is active for a slot, it collapses to zero height.
Add an Inline Slot
Place DigiaSlot where you want Native Display content rendered inline.
- React Native
- Flutter
- Android
- iOS (Swift)
import React from 'react';
import { ScrollView } from 'react-native';
import { DigiaSlotView } from '@digia-engage/core';

export function HomeScreen() {
  return (
    <ScrollView>
      {/* Auto-sizes to match native content height. Pass style={{ height: N }} to pin a fixed height. */}
      <DigiaSlotView placementKey="home_hero_banner" />

      <ProductCarousel />

      <DigiaSlotView placementKey="product_offers" />

      <RecommendationList />
    </ScrollView>
  );
}
import 'package:digia_engage/digia_engage.dart';
import 'package:flutter/material.dart';
class HomeScreen extends StatelessWidget {
const HomeScreen({super.key});
Widget build(BuildContext context) {
return Scaffold(
appBar: AppBar(title: const Text('Home')),
body: ListView(
children: const [
DigiaSlot('home_hero_banner'),
SizedBox(height: 16),
ProductCarousel(),
SizedBox(height: 16),
DigiaSlot('product_offers'),
SizedBox(height: 16),
RecommendationList(),
],
),
);
}
}
Jetpack Compose
import com.digia.engage.DigiaSlot

Column {
    DigiaSlot(placementKey = "home_hero_banner")
    DigiaSlot(placementKey = "product_offers")
}
XML Layout
For View/XML layouts, use DigiaSlotView. It wraps the Compose DigiaSlot API and reads app:placementKey from XML.
<LinearLayout
    xmlns:android="http://schemas.android.com/apk/res/android"
    xmlns:app="http://schemas.android.com/apk/res-auto"
    android:layout_width="match_parent"
    android:layout_height="wrap_content"
    android:orientation="vertical">

    <com.digia.engage.DigiaSlotView
        android:id="@+id/homeHeroBanner"
        android:layout_width="match_parent"
        android:layout_height="wrap_content"
        app:placementKey="home_hero_banner" />

    <com.digia.engage.DigiaSlotView
        android:id="@+id/productOffers"
        android:layout_width="match_parent"
        android:layout_height="wrap_content"
        app:placementKey="product_offers" />

</LinearLayout>
Or set the placement programmatically after inflation:
import com.digia.engage.DigiaSlotView

override fun onCreate(savedInstanceState: Bundle?) {
    super.onCreate(savedInstanceState)
    setContentView(R.layout.activity_home)

    findViewById<DigiaSlotView>(R.id.homeHeroBanner).placementKey = "home_hero_banner"
    findViewById<DigiaSlotView>(R.id.productOffers).placementKey = "product_offers"
}
DigiaSlotView requires DigiaHost to be mounted in the same window so the Digia rendering engine is already mounted before the slot renders.
import SwiftUI
import DigiaEngage

struct HomeScreen: View {
    var body: some View {
        ScrollView {
            VStack(spacing: 16) {
                DigiaSlot(placementKey: "home_hero_banner")
                ProductCarousel()
                DigiaSlot(placementKey: "product_offers")
                RecommendationList()
            }
            .padding()
        }
    }
}
Serve Inline Content from CleverTap
Inline campaigns are delivered the same way as nudges — through a Native Display campaign carrying a digia_campaign_key. Build the inline campaign in the Digia dashboard (it defines which slot / placementKey it renders into), then set digia_campaign_key to the Digia campaign key from that campaign:
{
  "digia_campaign_key": "home_hero_banner_campaign"
}
| Field | Required | Description |
|---|---|---|
digia_campaign_key | Yes | The Digia campaign key of an inline campaign copied from your Digia dashboard. The campaign defines which slot key it renders into. |
The app-side DigiaSlot / DigiaSlotView placementKey must match the slot key configured on that campaign in the Digia dashboard.
Inline content stays loaded once a campaign renders it — it doesn't clear when the user's context changes. To clear it (for example on logout), see Managing Inline Content.
Setting Up Guide Anchors
DigiaAnchor registers a UI element as a named anchor for tooltip and spotlight Guide campaigns. When a Guide campaign runs, the SDK looks up the anchorKey to position the tooltip bubble or spotlight cutout relative to that element.
Wrap any element you want to anchor and give it a unique anchorKey. The key must match exactly what is configured for that step in the Digia dashboard Guide campaign.
- React Native
- Flutter
- Android
- iOS (Swift)
import { DigiaAnchorView } from '@digia-engage/core';

// Anywhere in your screen component:
<DigiaAnchorView anchorKey="buy_now_button">
  <BuyNowButton />
</DigiaAnchorView>
import 'package:digia_engage/digia_engage.dart';

// Anywhere in your widget tree:
DigiaAnchor(
  anchorKey: 'buy_now_button',
  child: BuyNowButton(),
)
Jetpack Compose
import com.digia.engage.DigiaAnchor

// Anywhere in your composable:
DigiaAnchor(anchorKey = "buy_now_button") {
    BuyNowButton()
}
XML Layout
<com.digia.engage.DigiaAnchorView
    android:layout_width="wrap_content"
    android:layout_height="wrap_content"
    app:anchorKey="buy_now_button">

    <!-- Your view -->
    <Button
        android:layout_width="wrap_content"
        android:layout_height="wrap_content"
        android:text="Buy Now" />

</com.digia.engage.DigiaAnchorView>
import DigiaEngage

// Anywhere in your view hierarchy:
DigiaAnchor(anchorKey: "buy_now_button") {
    BuyNowButton()
}
Note: If the anchor is not mounted when a Guide campaign fires, the SDK logs an
anchor_not_on_screenhealth event and skips that step. Ensure the anchor is on screen before navigating to the Guide step.
Link the CleverTap Campaign to Digia
To connect a Native Display campaign to your Digia Guide, you must tell CleverTap which Digia campaign to render. In the Digia dashboard, copy the Digia campaign key assigned to your Guide campaign. Then, in the CleverTap Native Display campaign, add a Custom key-value pair with the key set to digia_campaign_key and the value set to the copied key.
Note: The
digia_campaign_keyvalue must exactly match the Digia campaign key from the dashboard. If they differ, the plugin cannot resolve the campaign and nothing renders.
Setting Up Surveys
Surveys are multi-step questionnaire flows you design in the Digia dashboard and render as overlays in the nudge host — no extra app-side widget is required beyond the nudge container. A survey is just another campaign type: create it in Digia, then trigger it from CleverTap using DigiaTemplate, exactly like a nudge.
- Build the survey campaign in the Digia Engage Dashboard and copy its Digia campaign key.
- Ensure your app mounts the nudge container —
DigiaHostat the app root (all platforms). - Create a CleverTap In-App campaign using
DigiaTemplateand setdigia_campaign_keyto the survey's Digia campaign key.
| Field | Required | Example value | Description |
|---|---|---|---|
digia_campaign_key | Yes | nps_q3_survey | The Digia campaign key of the survey campaign copied from your Digia dashboard. |
The survey renders over your app content and reports completion back through the plugin's analytics events.
Test Your Integration
Follow these steps to verify end-to-end functionality before releasing:
- Verify initialization order —
Digia.initializecompletes, thenDigia.register(DigiaCleverTapPlugin()), beforerunApp/ first activity. - Verify host placement —
DigiaHostmust be inMaterialApp.builder(Flutter), the root Composable (Android Compose), or the root SwiftUI wrapper (iOS). For React Native, mount<DigiaHost />once at the app root. - Sync
DigiaTemplate— run in debug mode as a CleverTap test user (see Sync DigiaTemplate to Dashboard). - Create a test campaign — create an In-App campaign using
DigiaTemplateand trigger it immediately for your test device. - Verify inline slots — place
DigiaSlot/DigiaSlotViewon a visible screen, create a Native Display campaign with matching placement keys, and confirm content renders. - Verify screen tracking — navigate between screens and confirm that screen-triggered campaigns fire on the correct screen (use
DigiaNavigatorObserveron Flutter,Digia.setCurrentScreen(...)ordigiaScreen("...")in Android View/XML apps, route/screen change hooks callingDigia.setCurrentScreen(...)on Swift, and navigation listeners callingDigia.setCurrentScreen(...)on React Native). See Reporting the Current Screen for per-stack and per-router wiring, and Screen Targeting to scope campaigns to specific screens.
Troubleshooting
Campaign not rendering
- Confirm initialization order —
Digia.initialize(...)thenDigia.register(DigiaCleverTapPlugin()). - Android only: Confirm
CleverTapAPI.getDefaultInstance(this)is called beforeDigia.register(...). - iOS (Swift): Confirm
CleverTap.autoIntegrate()runs at app start andInfo.plistincludesCleverTapAccountID/CleverTapToken. - React Native: Confirm
Digia.initialize(...)andDigia.register(new DigiaCleverTapPlugin(...))are called once during app startup. - Ensure
DigiaHostis mounted at the app root. - React Native: Ensure
<DigiaHost />is mounted once at app root, andapp.jsoncontains CleverTap plugin credentials. - Verify campaign eligibility and trigger conditions in the CleverTap dashboard.
Inline content not showing
- Confirm Native Display payload includes placement key/value pairs.
- Ensure placement key in payload matches
DigiaSlot('placement_key')orDigiaSlotView app:placementKey. - Verify the slot exists on the currently visible screen.
- React Native:
DigiaSlotViewauto-sizes to match native content height. If it still appears collapsed, confirm the Native Display campaign is active and theplacementKeymatches. To pin a fixed height, passstyle={{ height: 180 }}.
Screen-triggered campaign not firing
- Add
DigiaNavigatorObserver()tonavigatorObservers(Flutter). - Call
Digia.setCurrentScreen(...)on navigation changes (Android Compose:navController.addOnDestinationChangedListener). - Android XML / Views: Call
digiaScreen("screen_name")fromActivity.onResume()orFragment.onResume(). - For unnamed routes, call
Digia.setCurrentScreen('screen_name')manually. - iOS (Swift): On tab/route changes, call
Digia.setCurrentScreen("screen_name")from your navigation layer. - React Native: Wire navigation change events (React Navigation / Expo Router) to
Digia.setCurrentScreen(routeName).
CleverTap default instance is null (Android)
- Ensure
ActivityLifecycleCallback.register(this)andCleverTapAPI.getDefaultInstance(this)are called beforeDigia.register(DigiaCleverTapPlugin(applicationContext)). - Verify CleverTap credentials are correctly set in
AndroidManifest.xmlper CleverTap Android Quick Start.