Inline Carousel with WebEngage
This guide walks you through creating an Inline Carousel, connecting it to WebEngage, and testing it inside an app slot. Inline campaigns render inside a developer-defined slot in your app layout instead of appearing as an overlay.
Use an Inline Carousel for homepage offers, product discovery cards, feature banners, or merchandising slots.
Prefer a quick visual walkthrough first? Watch Creating Native Inline Content Experiences.
Before You Start
Make sure you have:
- Access to the correct Digia Engage project created with WebEngage as the CEP integration.
- Access to the matching WebEngage project.
- Your app must already be integrated with Digia Engage and WebEngage. Share the WebEngage developer integration guide with your app team if this setup is not complete yet.
- The audience and trigger event decided in WebEngage.
- A test profile or test segment in WebEngage so you can verify the campaign before launch.
- Your app team must have added a Digia inline slot where the carousel should render.
- The available slot key shared by your app team.
- Carousel image URLs and tap actions ready.
This guide is written for product managers and marketers. Developer-only setup is linked above so you know what must already be complete before campaign testing.
Slot keys
A slot key is the name your app team gives to a place in the app layout where Inline content can render. The slot key in Digia must match the app implementation exactly.
| Slot key | Where it appears |
|---|---|
home_carousel | Homepage hero carousel area |
product_offers | Product detail offer slot |
checkout_banner | Checkout reminder banner |
For developer setup details, see the Inline widgets section in the WebEngage developer integration guide. After slots are synced, review usable pages and slots in Component Registry before building the campaign.
Create an Inline Carousel Campaign
Go to Campaigns and choose New Campaign. Use a name such as:
Homepage Carousel Inline - WebEngage
On the Basics step, select Inline and choose Carousel as the widget type.
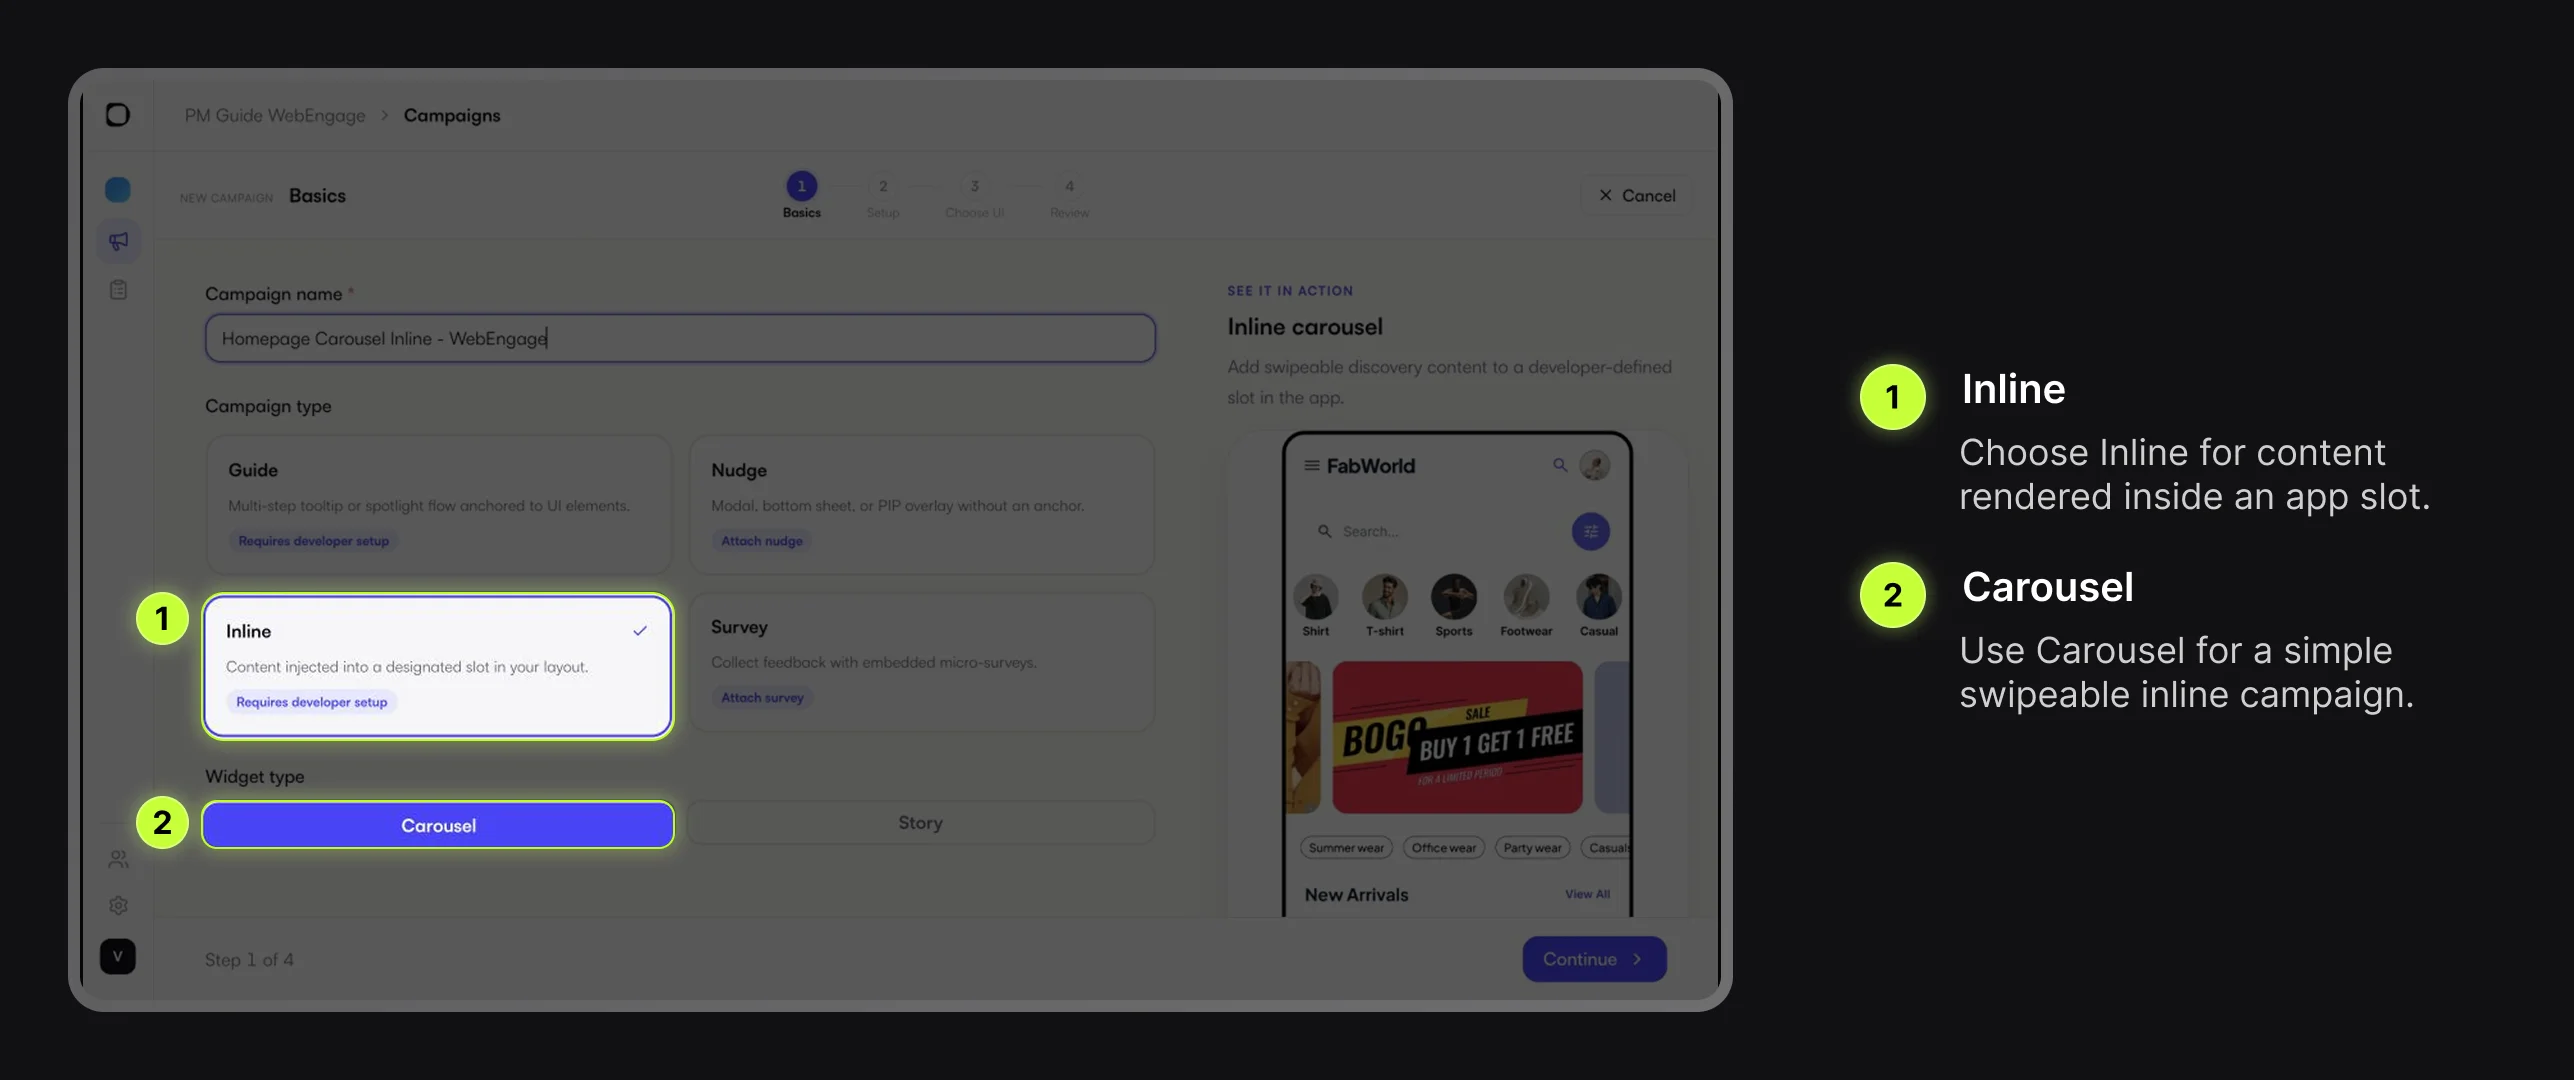
Confirm Setup Values
The Setup step shows the campaign key and optional screen targeting. Use Target screens only if the carousel should render on specific app screens.
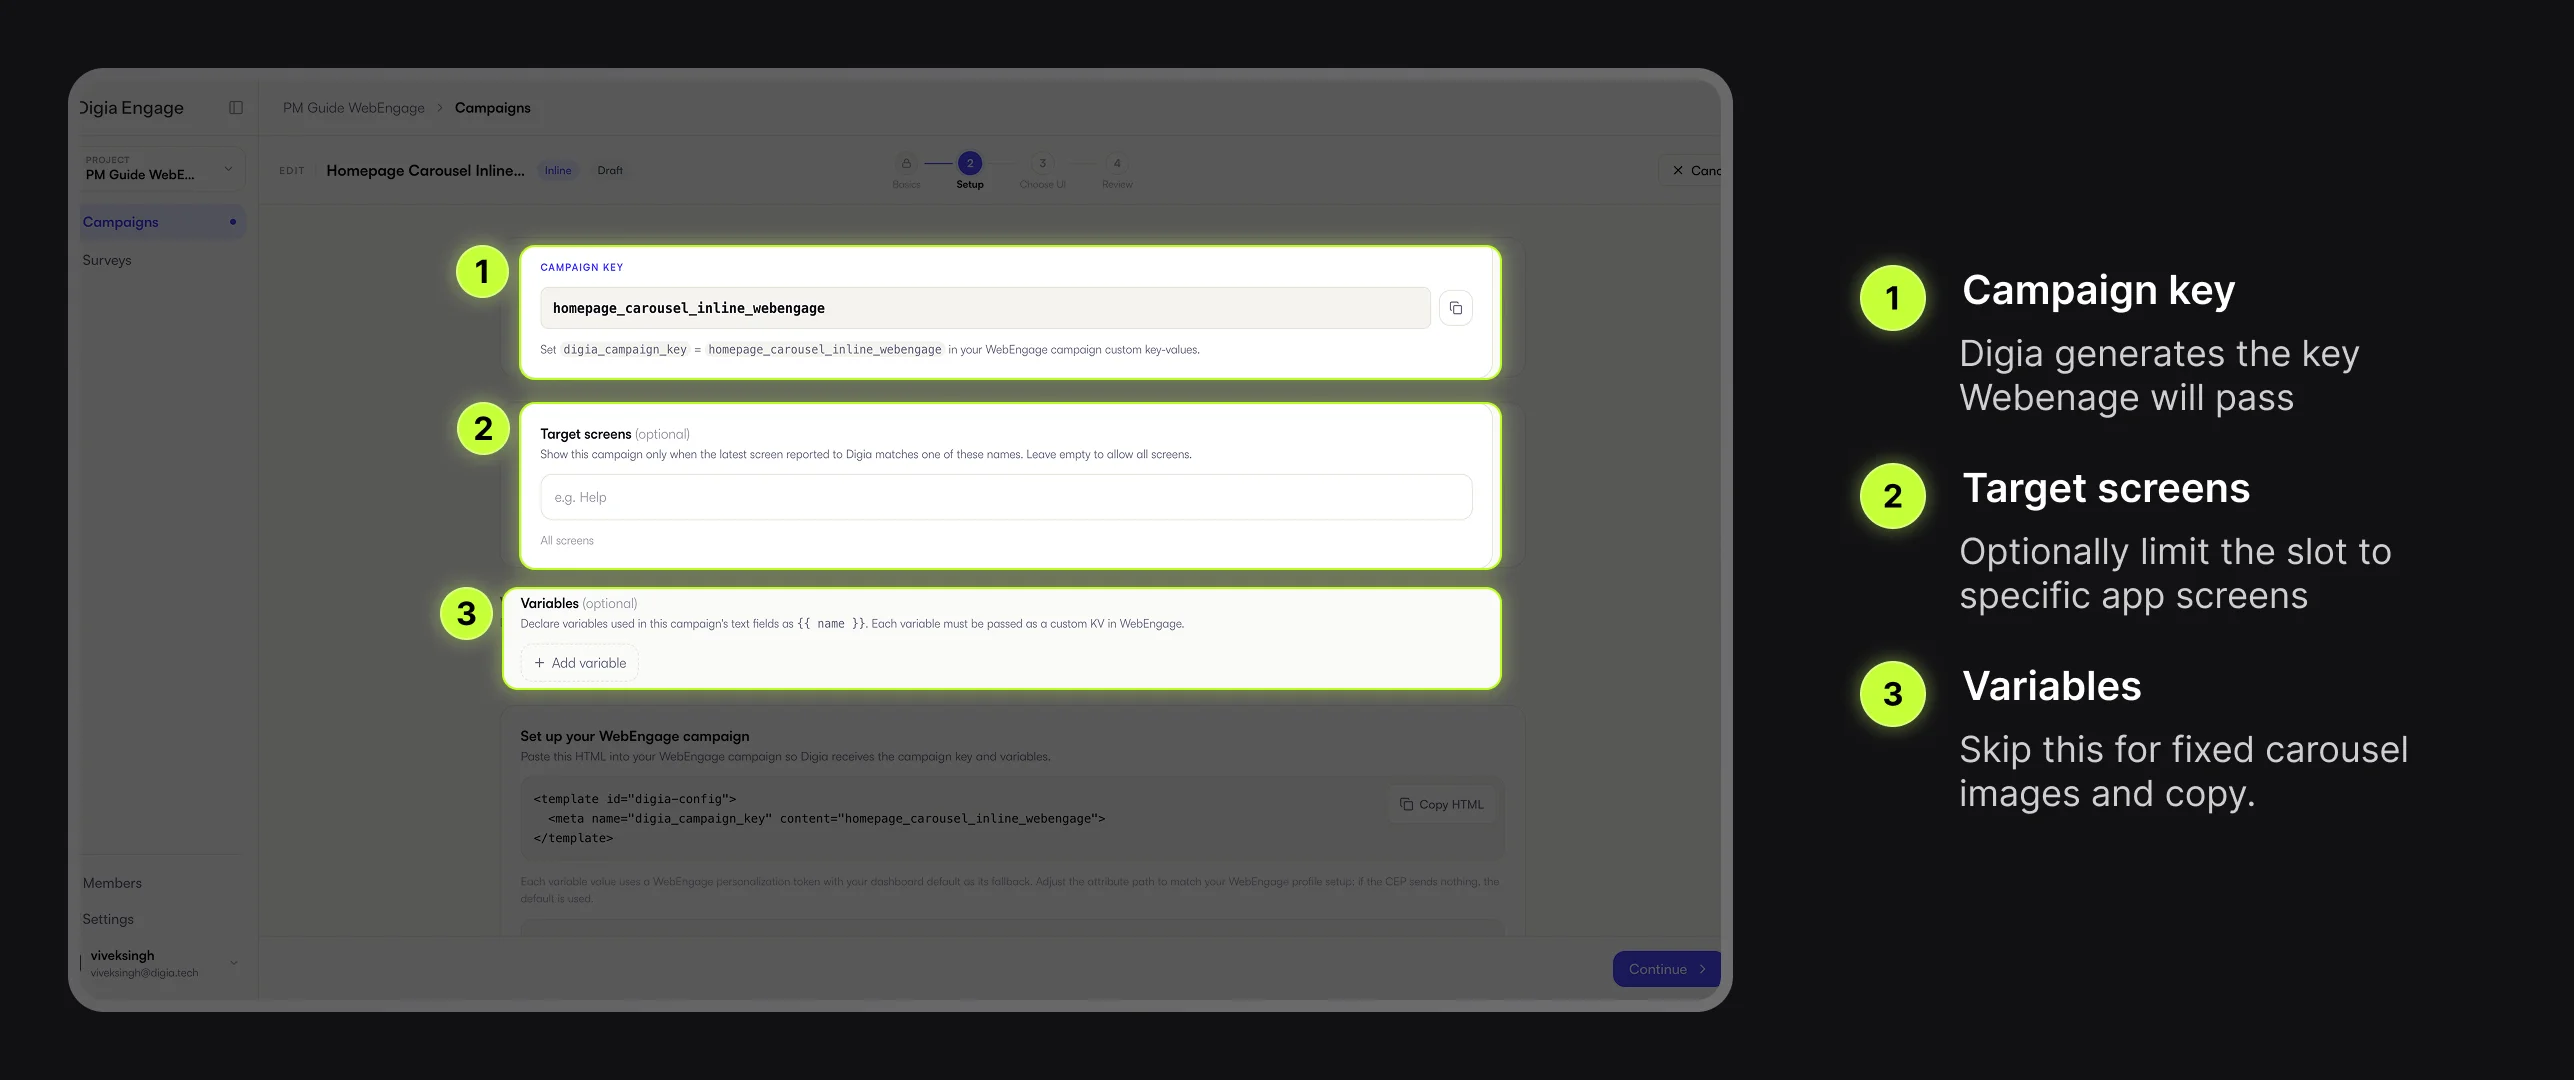
Build the Carousel
On the Choose UI step, add carousel items. For each image, paste the image URL and add a tap action only if tapping that image should open a deep link, URL, or another action.
In the Settings panel, enter the slot key provided by your app team.
home_carousel
Keep the default carousel settings unless you need to adjust height, auto-play, interval, infinite scroll, viewport fraction, or indicator dots.
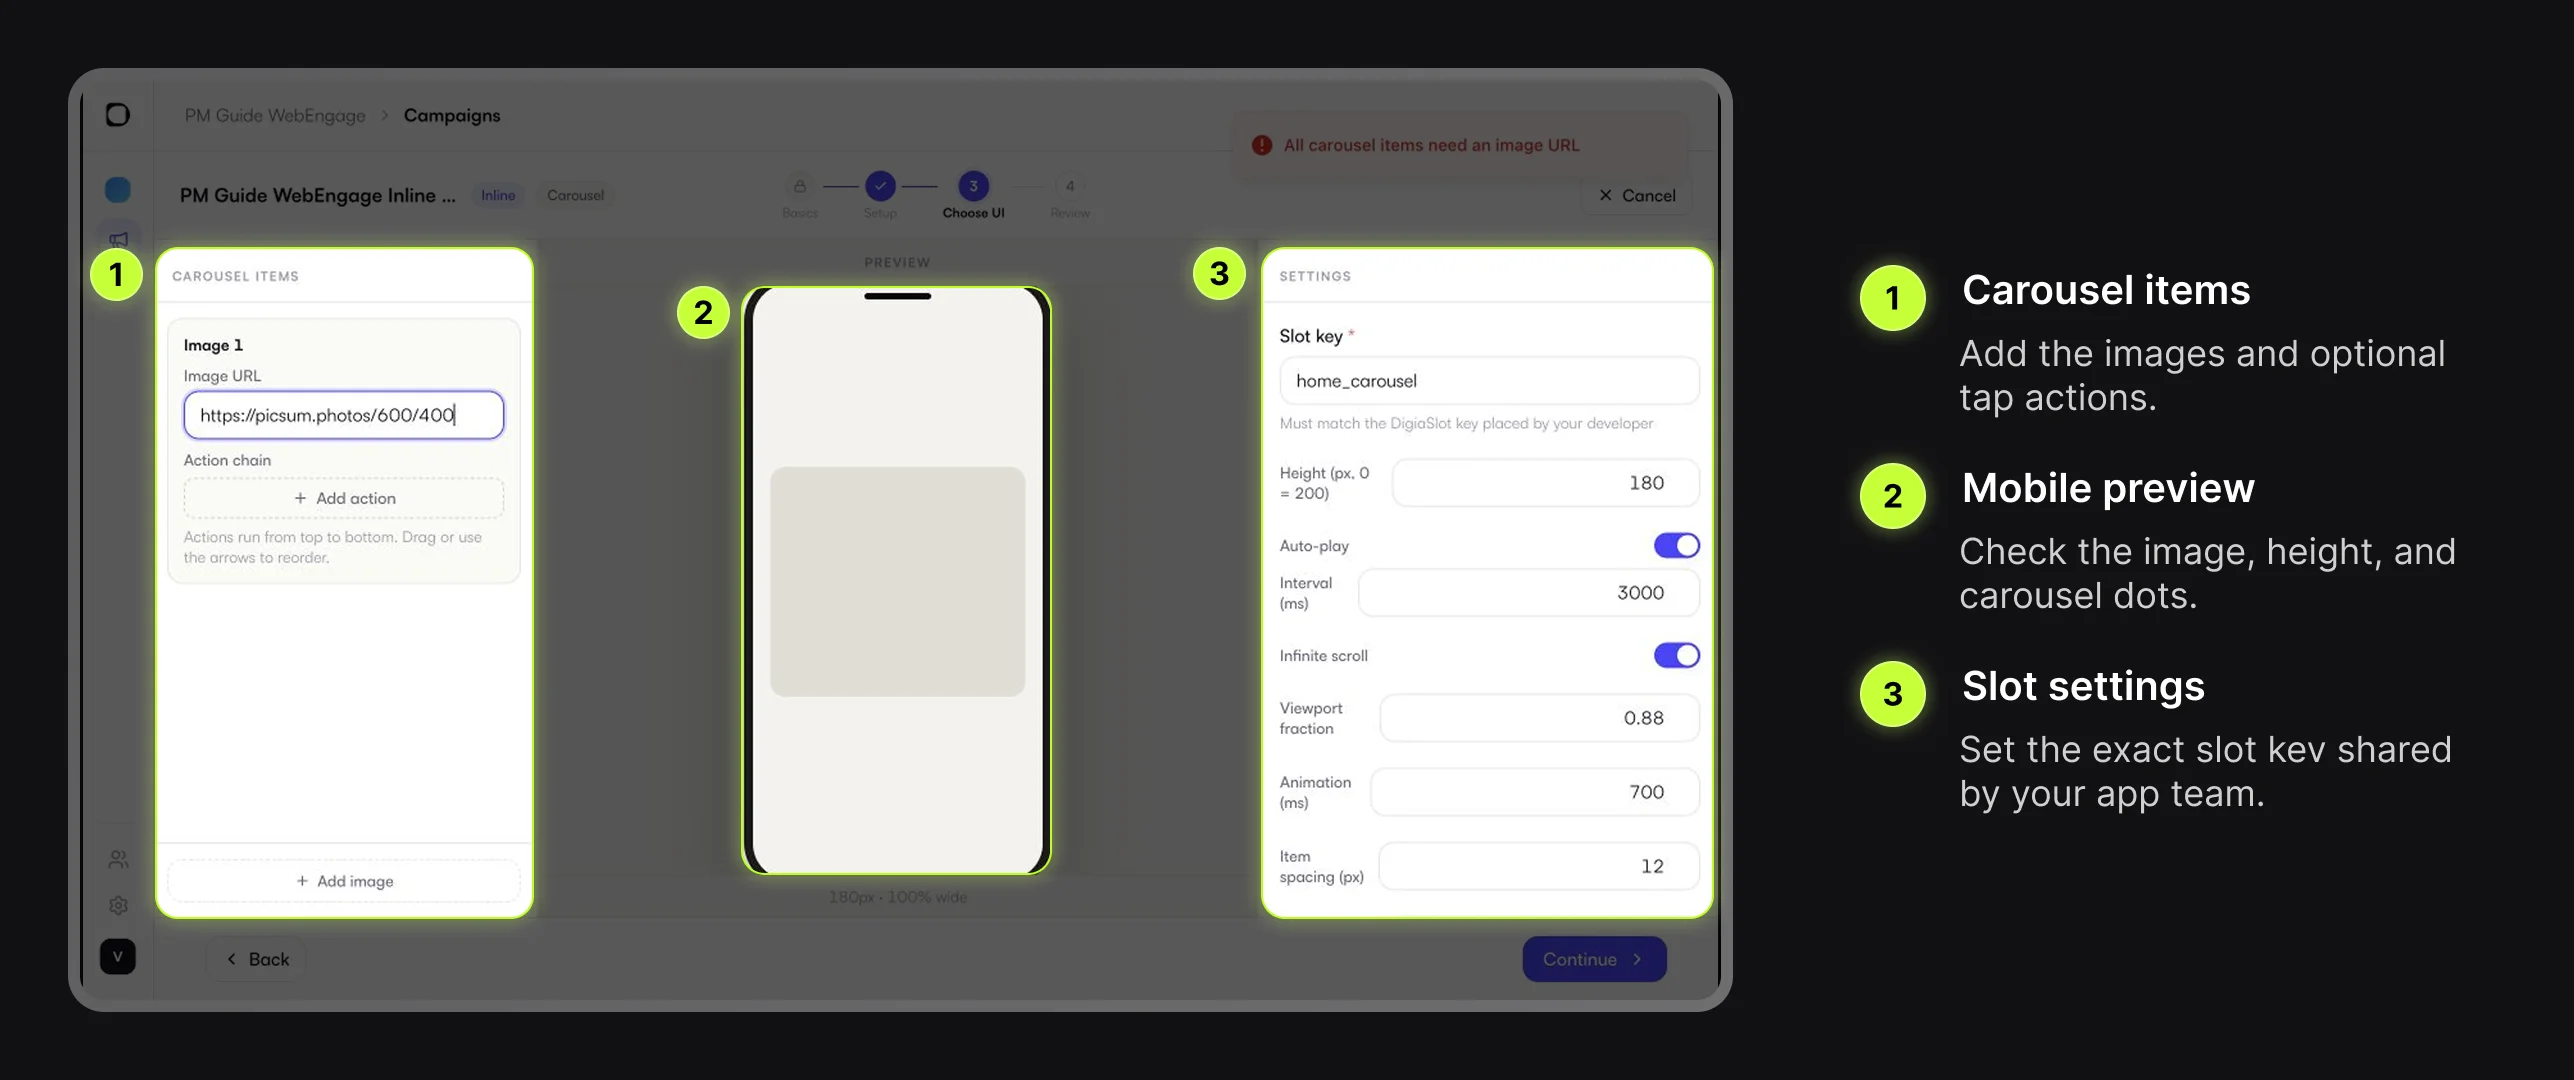
Once the Inline campaign UI is saved, use Live Testing Campaigns to send it to a connected debug device and confirm it renders inside the expected slot before moving into review and WebEngage setup.
Review the Inline Campaign
Check the campaign name, type, slot key, number of images, and launch checks. You can save as draft while WebEngage setup is pending, or activate when the carousel is ready.
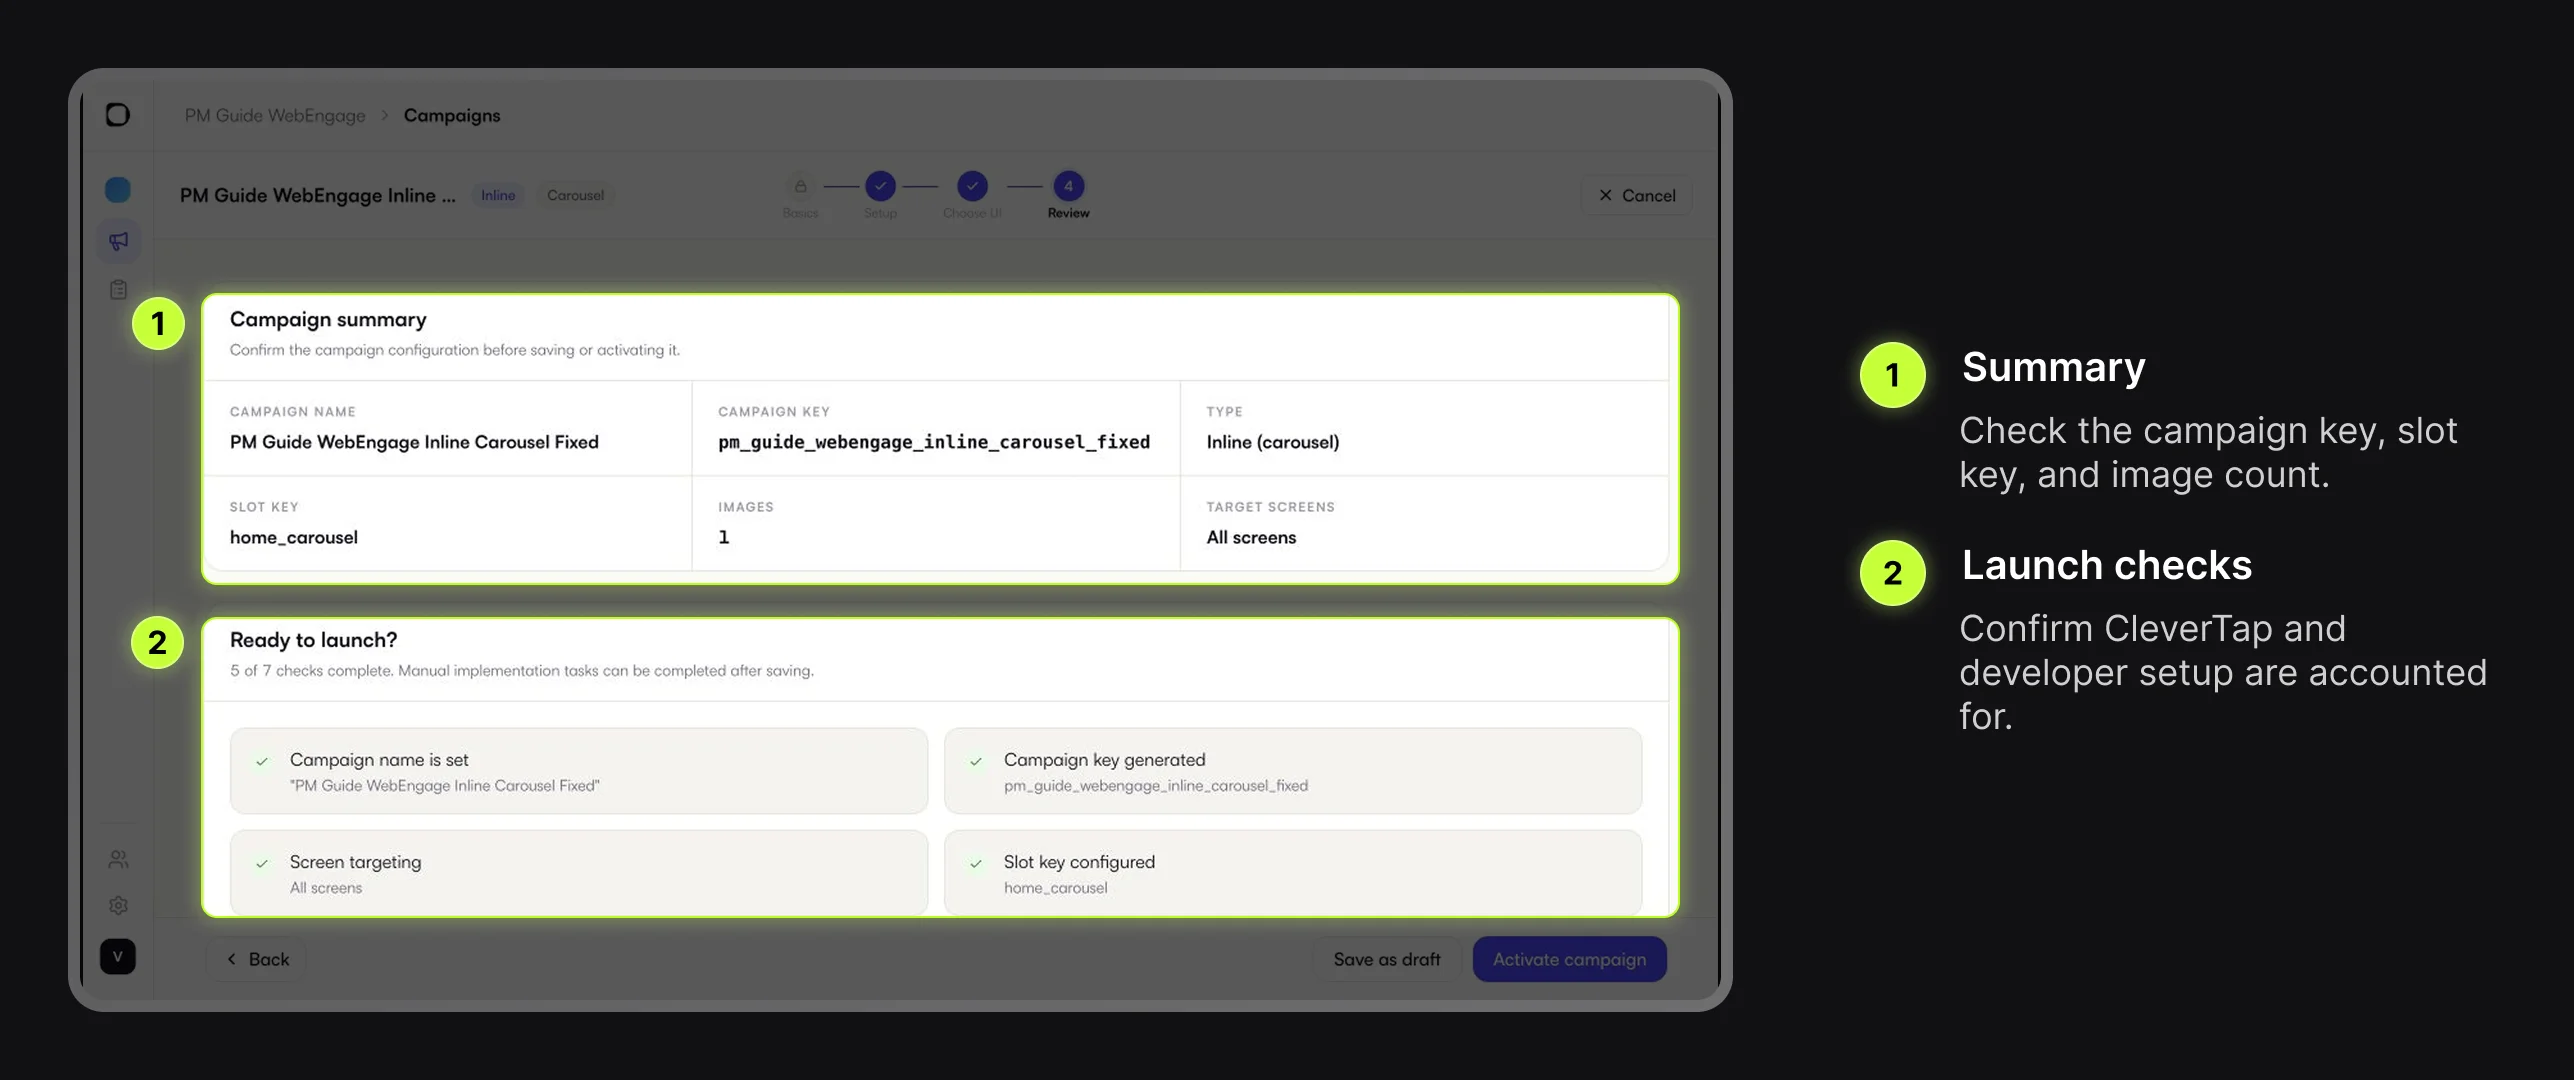
Copy the campaign key from the WebEngage setup section.
Create the WebEngage In-App Custom HTML Campaign
Create a WebEngage In-App campaign and use Custom HTML for the content step. WebEngage decides the audience, trigger event, schedule, and priority. Digia decides what renders after the campaign fires. Inline campaigns for WebEngage use the same campaign payload contract as other Digia experiences; the Digia campaign type tells the SDK to render into the matching slot.
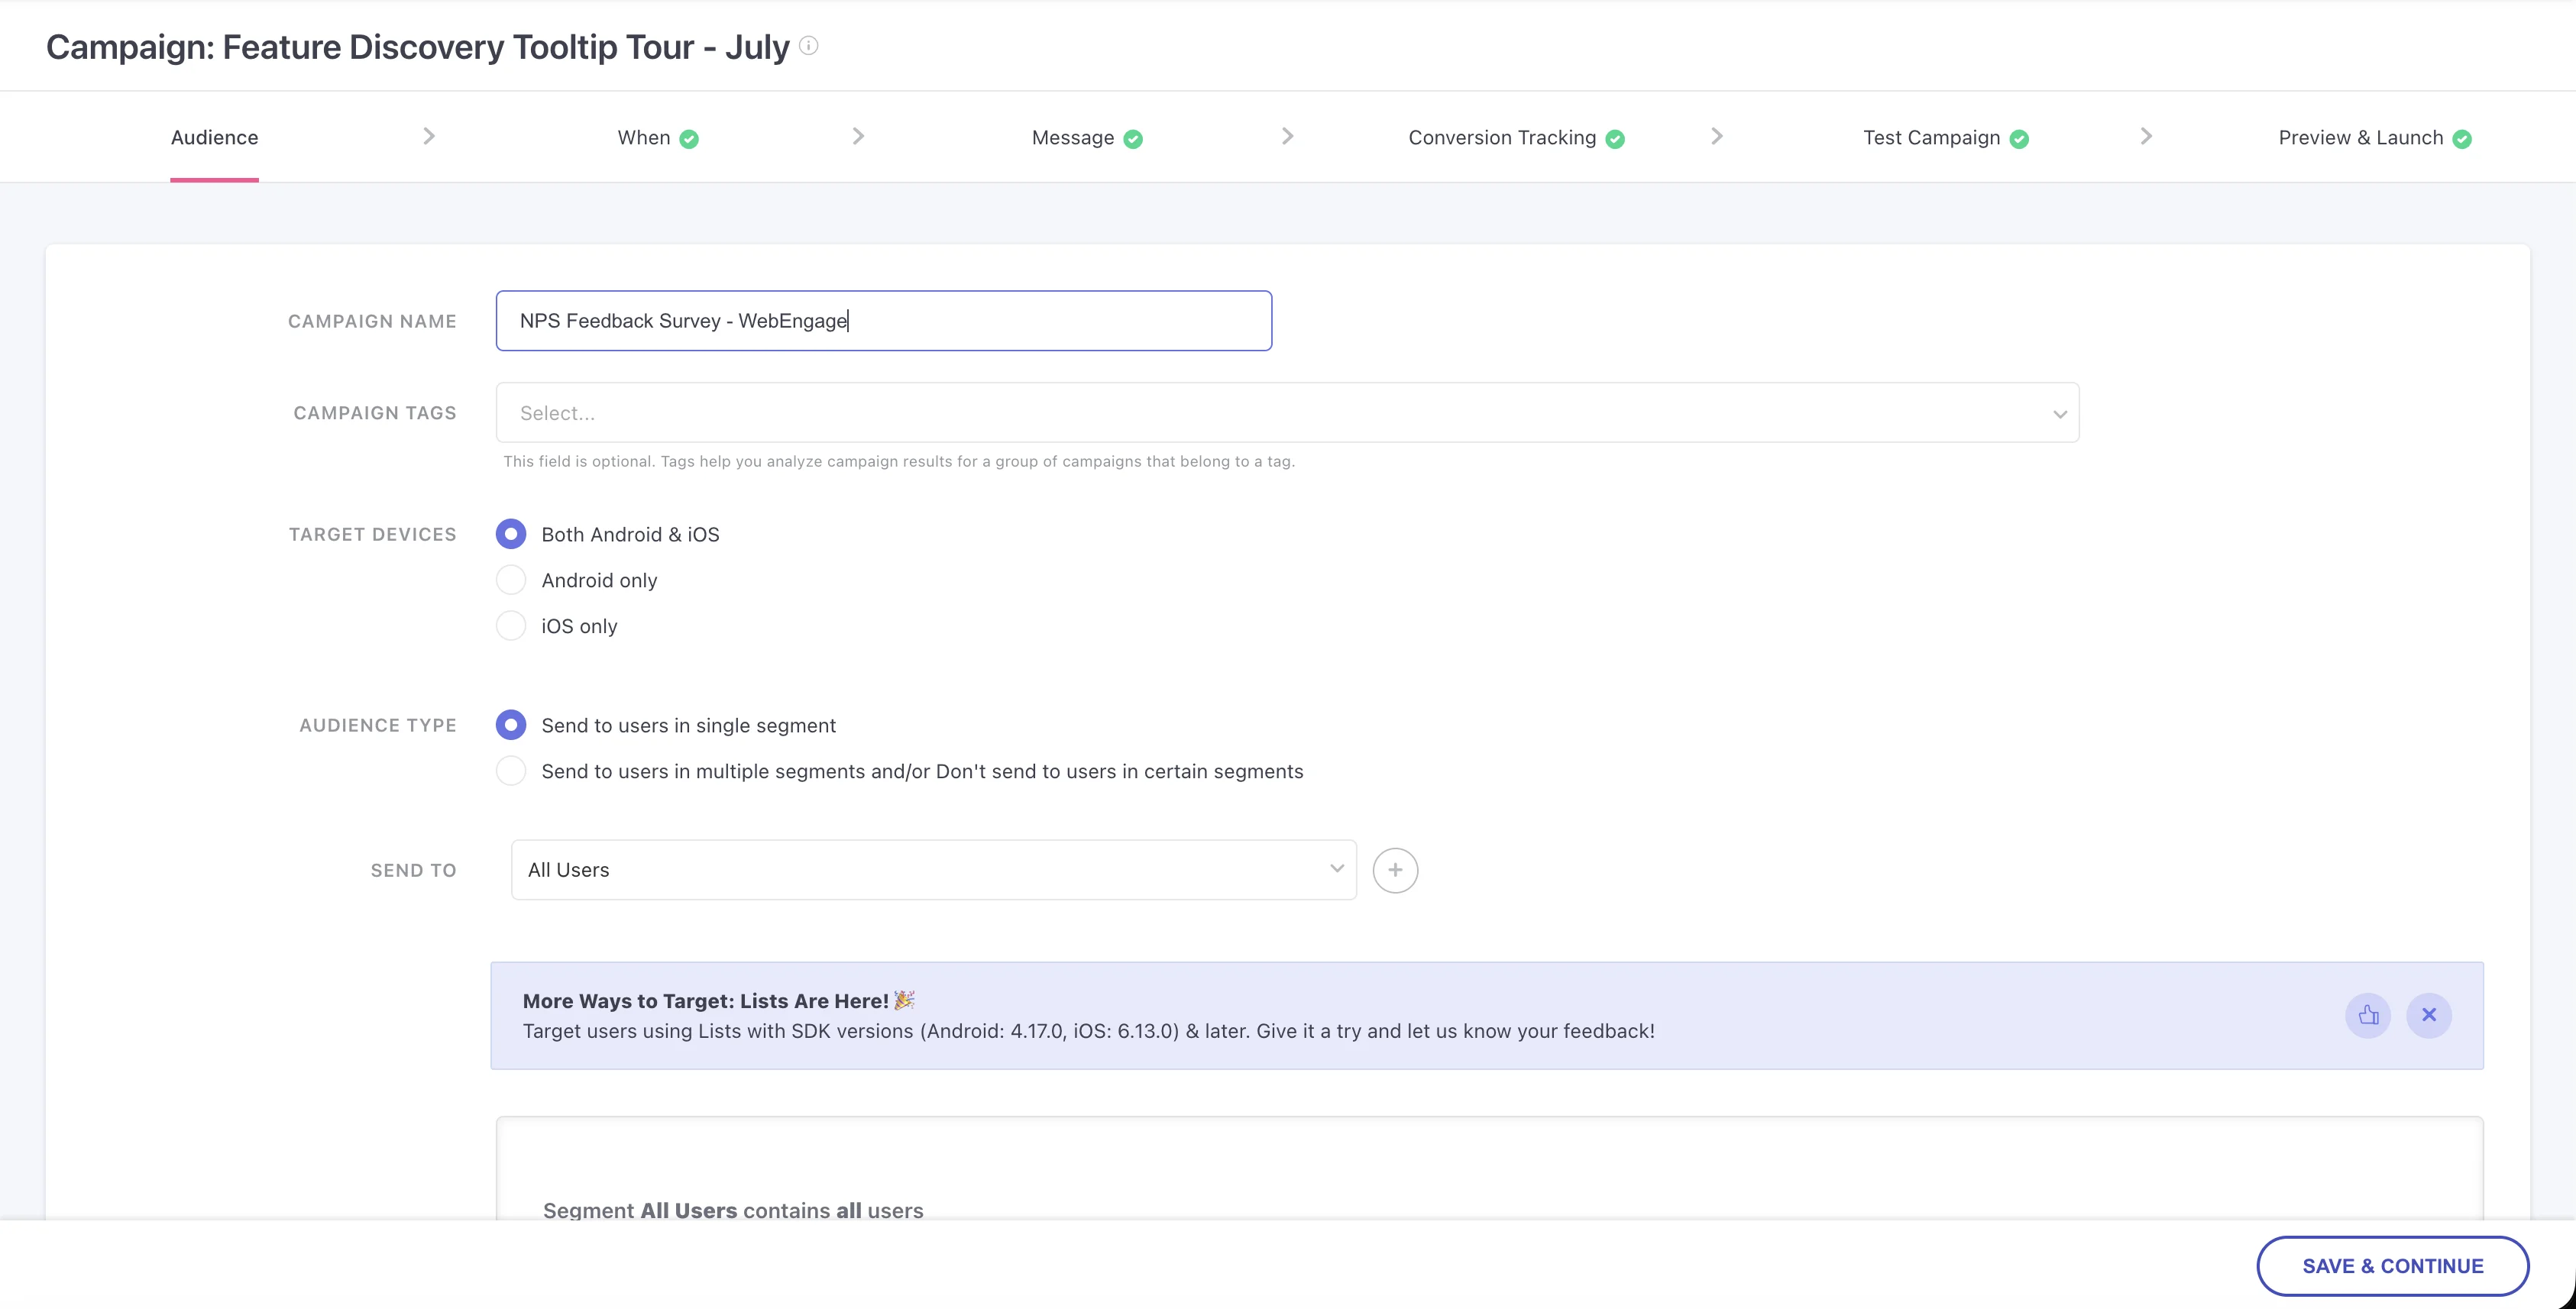
Start with the audience step. Name the campaign, choose the segment, and continue through the trigger and scheduling choices that match your launch plan.
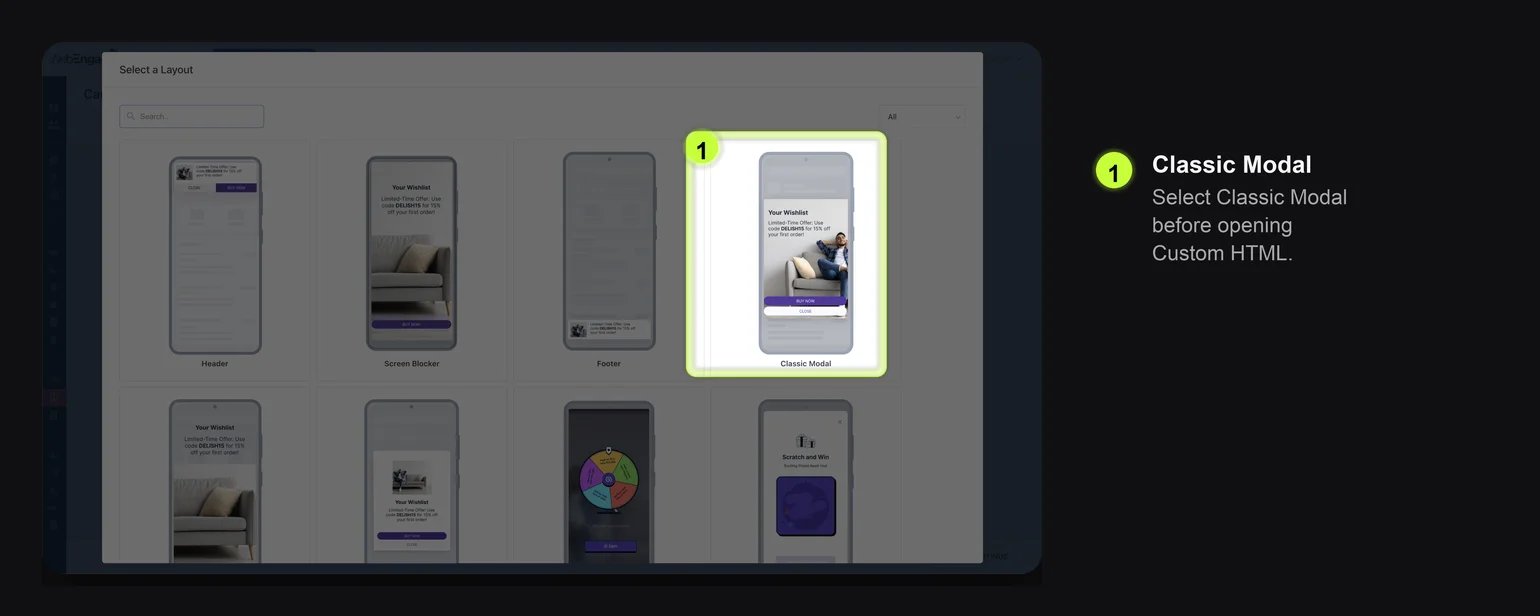
Choose Classic Modal as the In-App layout. Then use Custom HTML for the message content so WebEngage can pass the Digia Inline campaign key to the app.
Link WebEngage to the Digia Inline Campaign
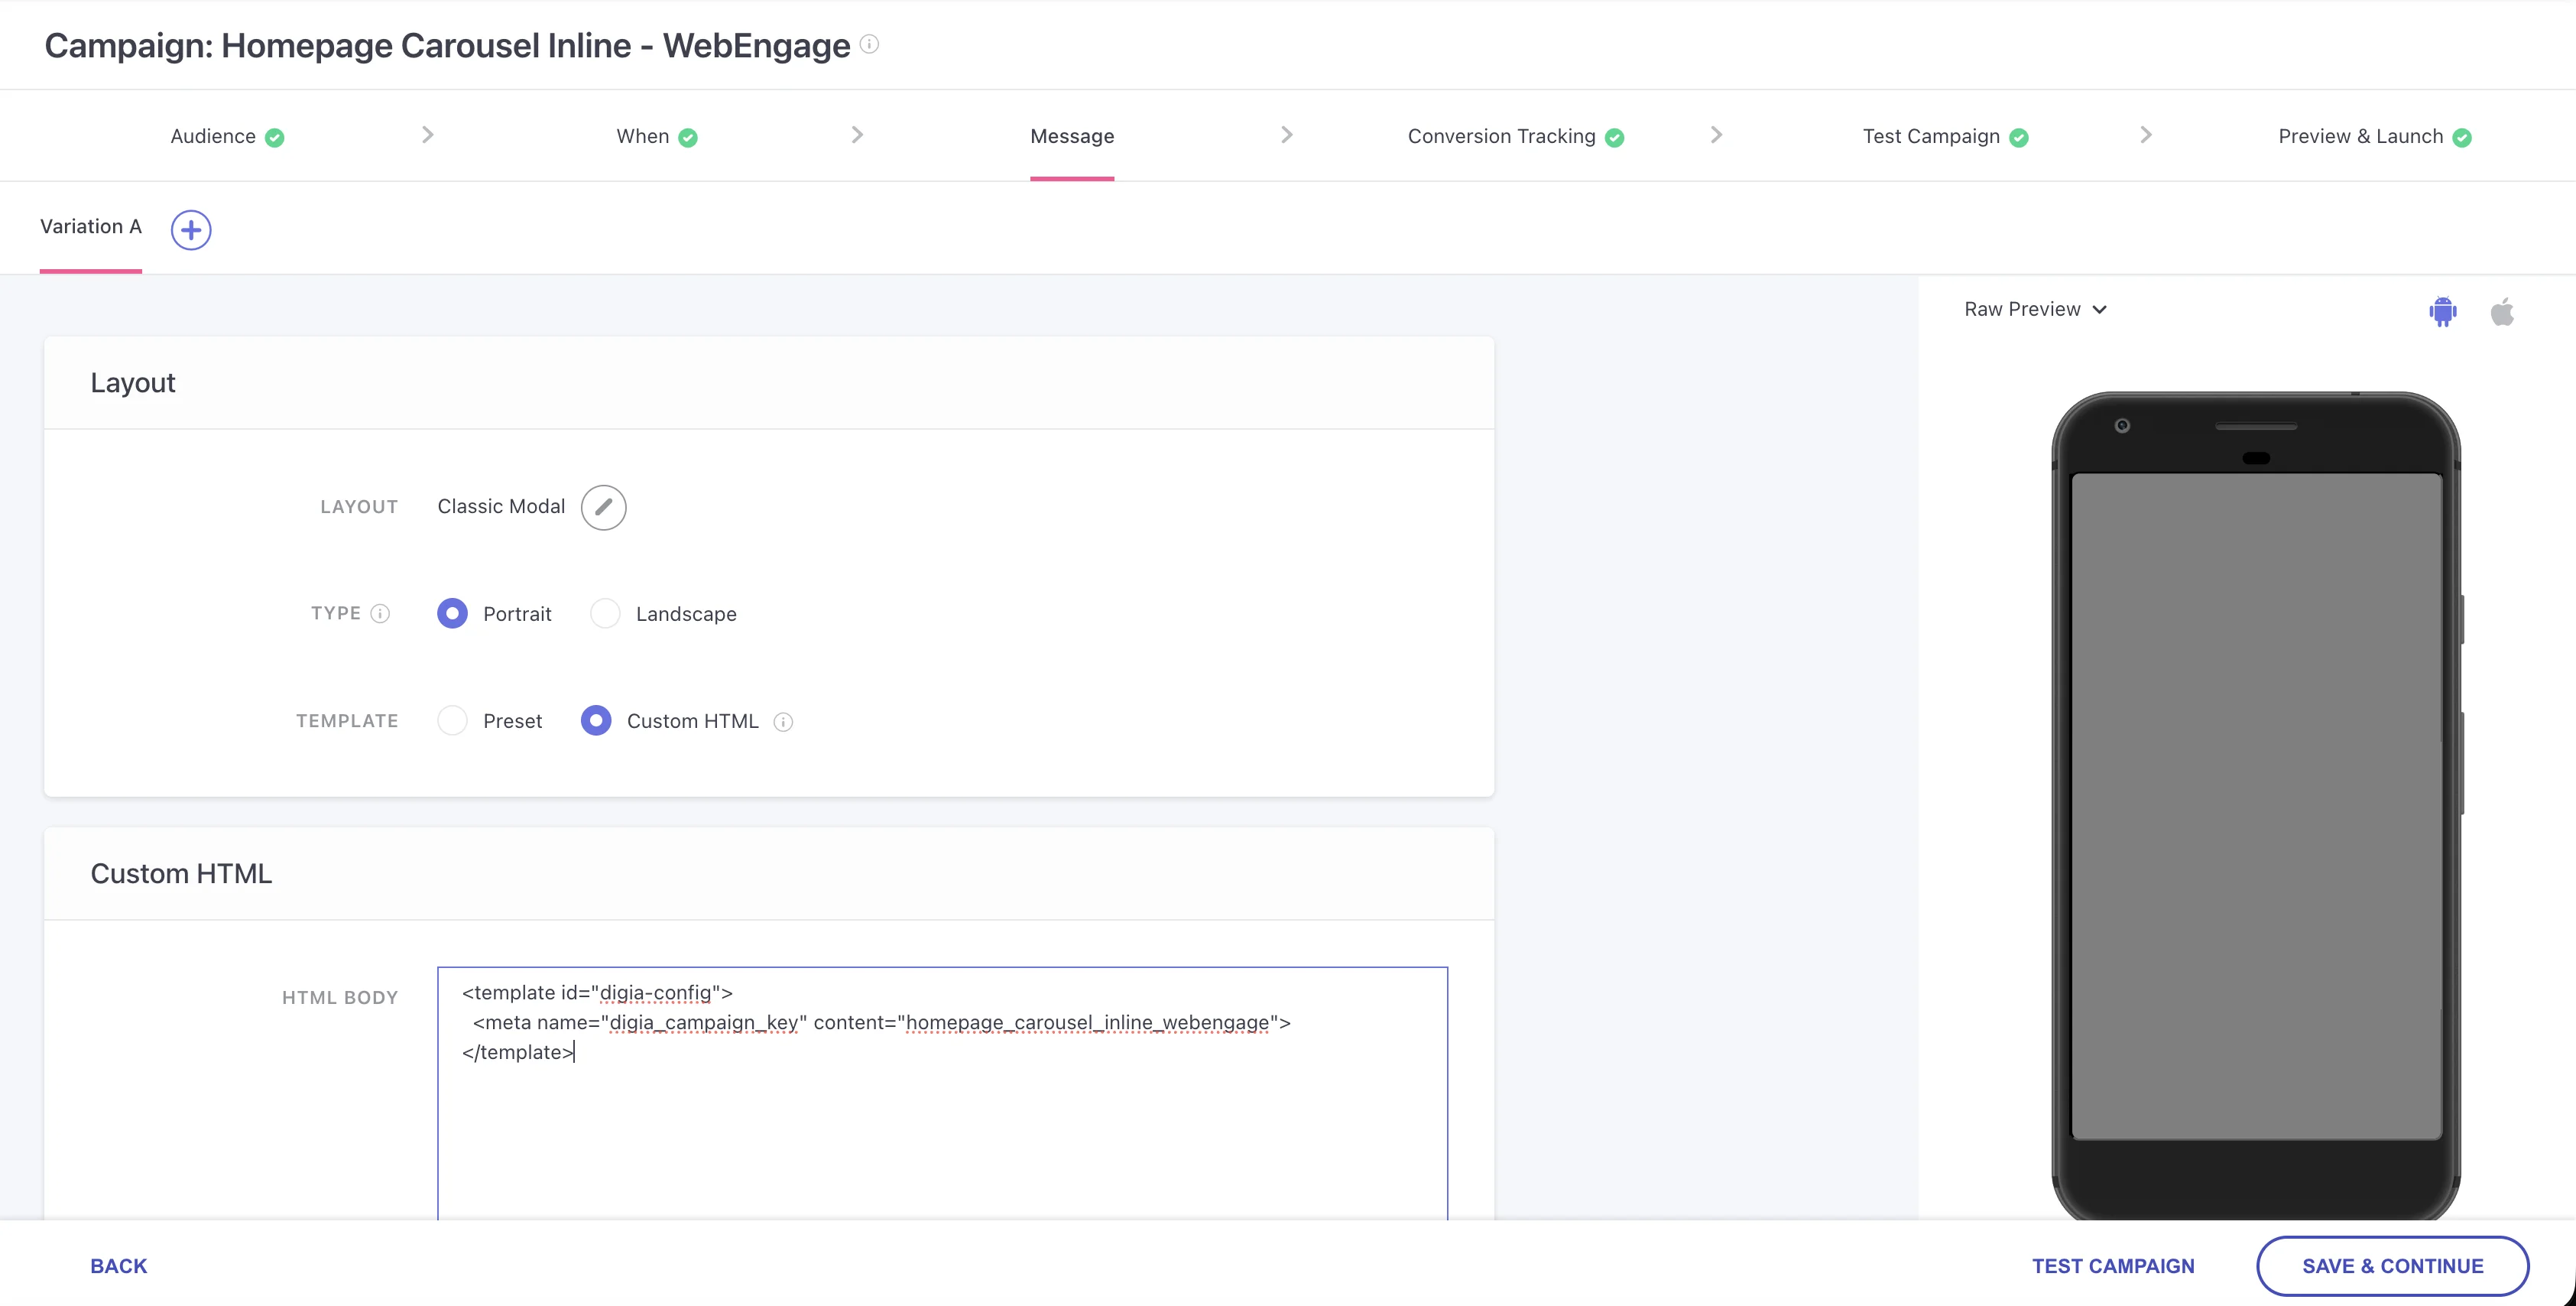
In the Custom HTML editor, add a digia-config block. Inline campaigns currently require only the digia_campaign_key meta tag.
<template id="digia-config">
  <meta name="digia_campaign_key" content="homepage_carousel_inline_webengage">
</template>
Keep the carousel images, slot key, and carousel behavior in Digia. WebEngage should only carry the campaign key.
Test the Inline Campaign End to End
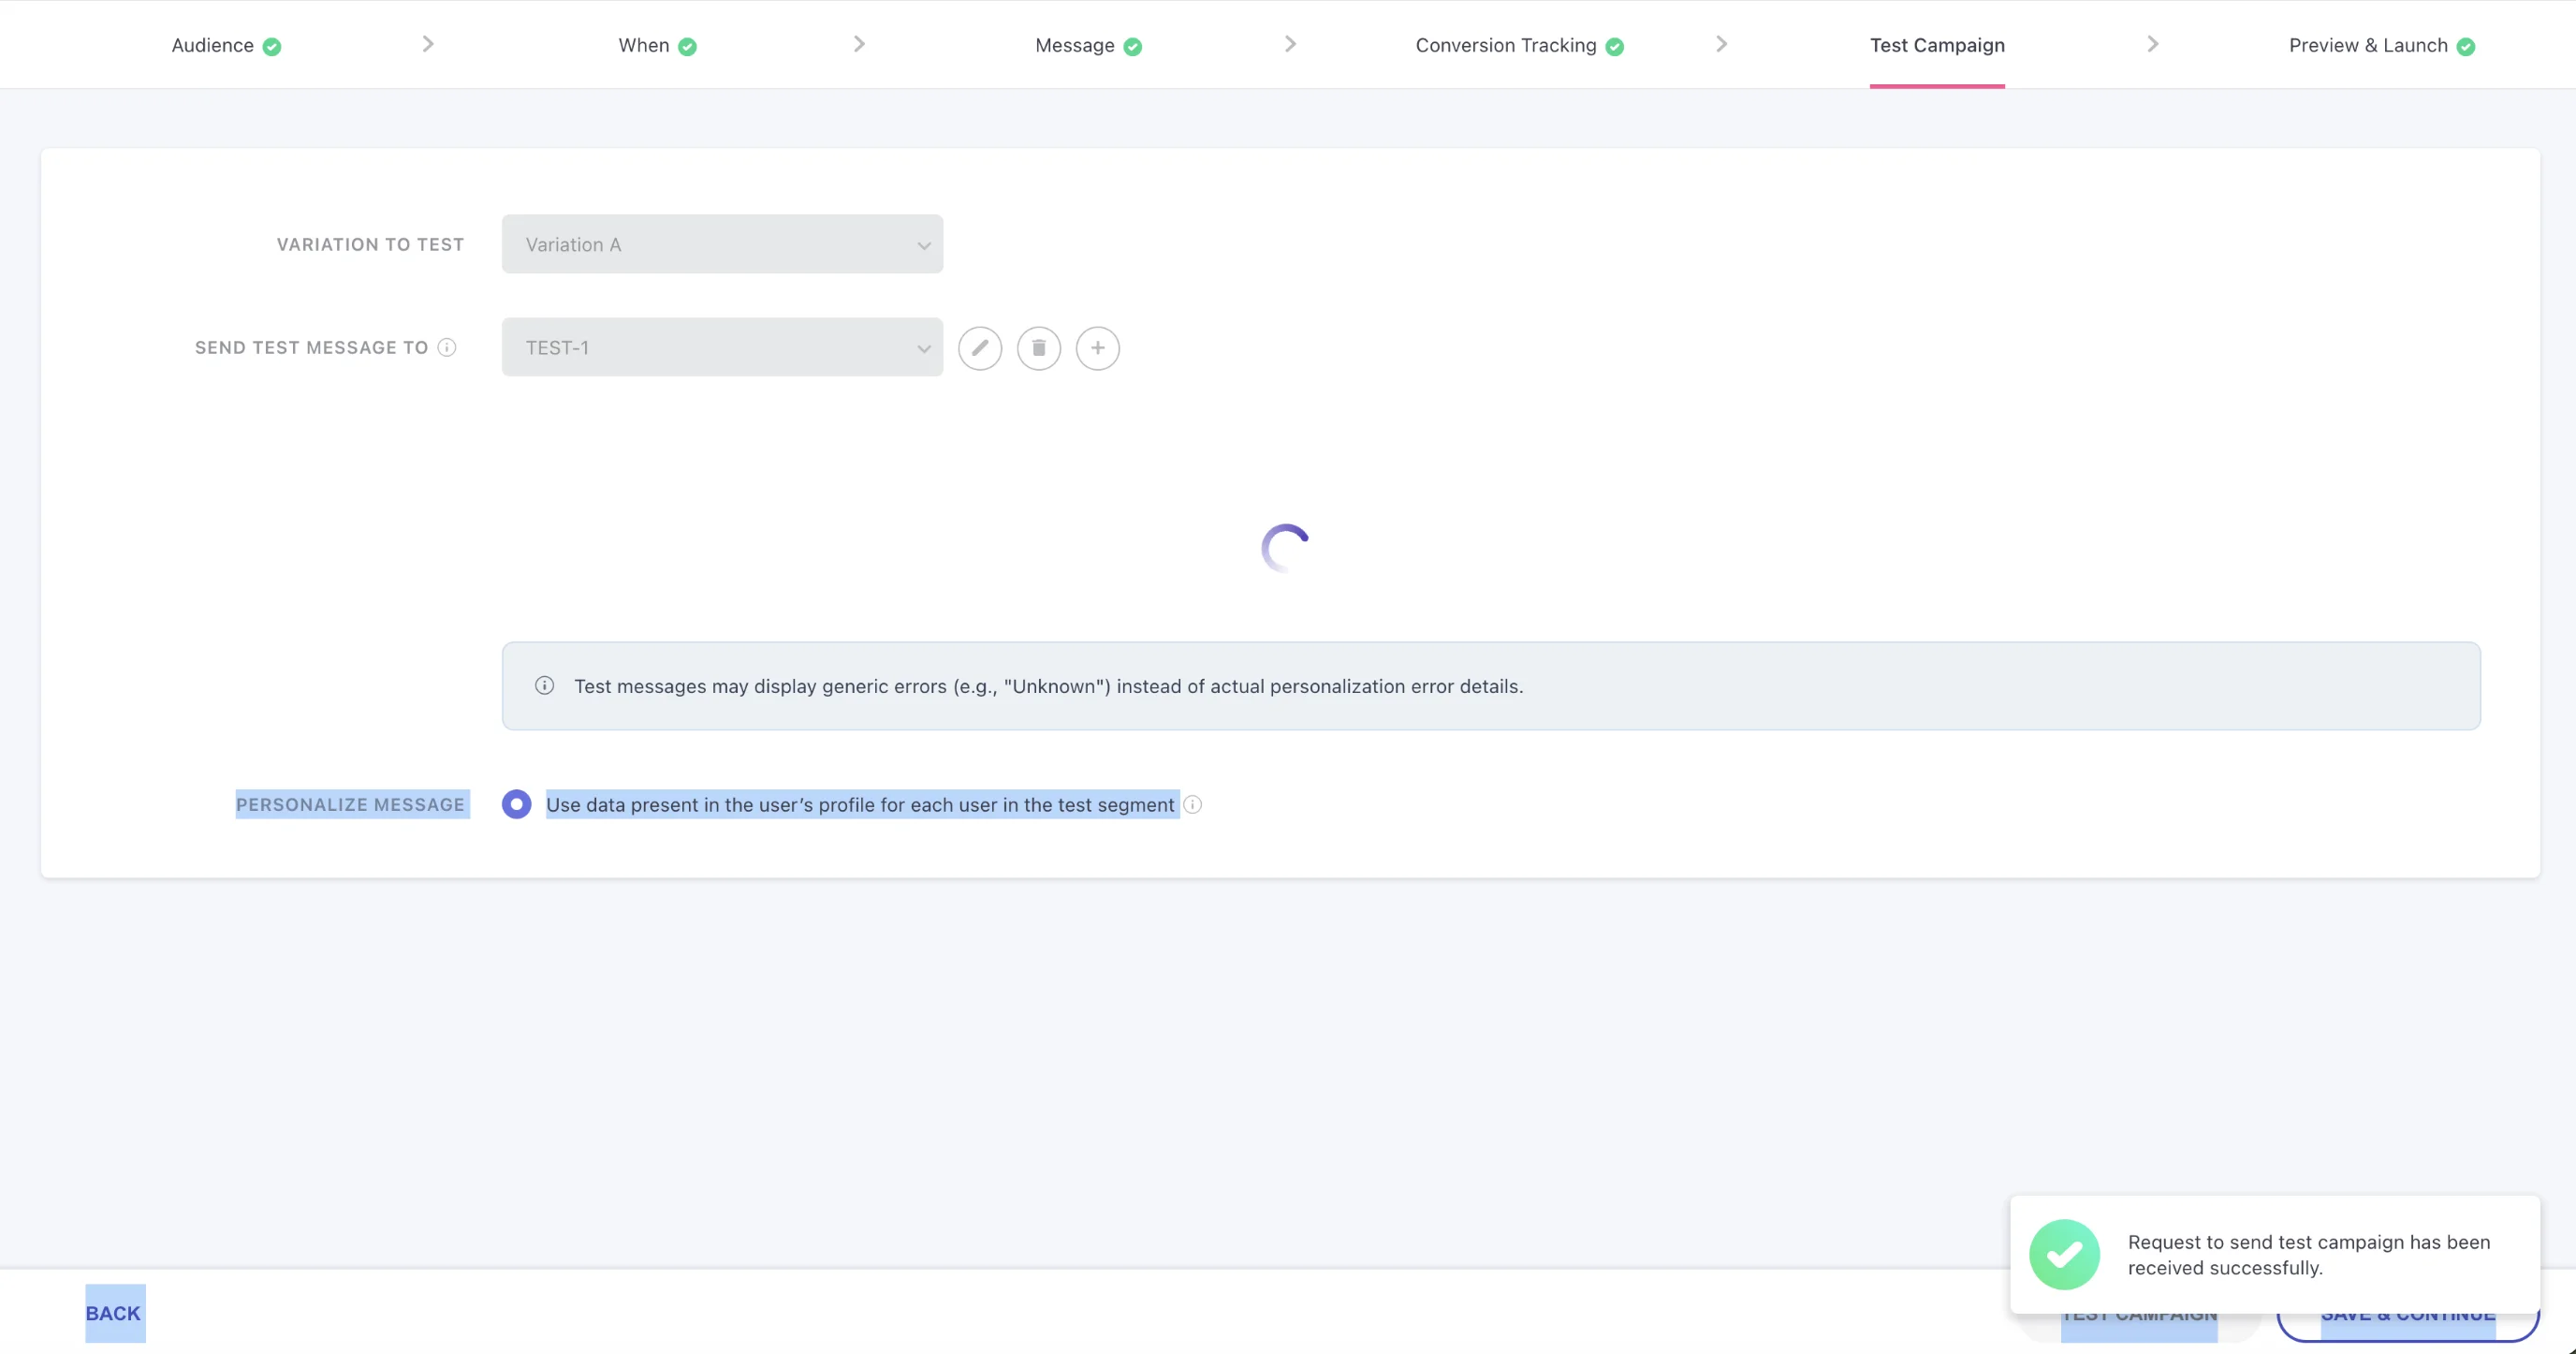
- Use a test audience in WebEngage.
- Activate or preview the WebEngage campaign for that audience.
- Open the app screen that contains the
home_carouselslot. - Trigger the event from a test device.
- Confirm the carousel appears inside the correct slot.
- Swipe through all carousel items.
- Tap any configured item action and confirm it performs the expected action.
If the Inline campaign does not appear, check:
| What to check | Why it matters |
|---|---|
| The Digia campaign is active | Draft campaigns will not render |
digia_campaign_key matches exactly | The key is case-sensitive |
| The WebEngage campaign uses In-App Custom HTML | The Digia plugin only receives the expected payload format |
| The app screen contains the slot | Inline content needs a mounted Digia slot |
| Slot key matches exactly | A typo prevents the carousel from rendering |
WebEngage can sometimes take time to start delivering a newly activated campaign. If the campaign still does not appear after your usual campaign propagation window, reach out to Digia support.
Launch Checklist
- Digia Inline campaign is active.
- WebEngage campaign uses In-App Custom HTML.
digia_campaign_keymatches the Digia campaign key.- Slot key matches the app team's placement key.
- The slot exists on the screen where WebEngage will trigger the campaign.
- Audience and trigger rules are correct in WebEngage.
- The carousel was tested on at least one real device.